Have you ever wondered how you can sharpen your style sense and design vision? Developing your style sense is a path of continual improvement. How does a sewist or sewista practice color coordination and accessorizing? I asked myself these questions a few months ago. This is why I bought a mannequin. I named her Katie and she serves as a model and advisor. It is one thing to envision an outfit I will make or coordinate from clothing I purchased. It is another experience to see that outfit on a mannequin.
A mannequin can be another you, your muse or the customer you target for your creations. The mannequin enables you to step back and behold the impact of the outfit. In this sense, you can experience the outfit and the impression it makes. This experience takes place in real time, whenever you walk into the room and see the mannequin. It is more immediate and vivid that reviewing selfies, or photos others have taken of you in the outfit. The mannequin lets you experience the outfit in real time.
I am styling outfits for Katie from the clothing I already have. For this posting I created a casual back-to-the office look using separates. I did not buy any of the pieces at the same time. My preference for certain colors made the coordination of this outfit possible. Choosing a basic black mini-skirt and pumps also made the outfit come together. I would recommend a similar approach if you decide to start styling outfits on a mannequin. Choose one piece in black, white, navy blue, grey, or brown. Then pair it with a piece in a complementary color or print.
Sharing photos of your styled look will help you get feedback.. There is an excitement to discussing a new outfit and consulting with others what will round it out. In the process you will be interacting with others in a way that design team members do. Everyone will see the outfit in a different way. Some will suggest you add an element, and some may critique it. It is important to accept the feedback with grace and use it as a means to grow your style sense and design skills.
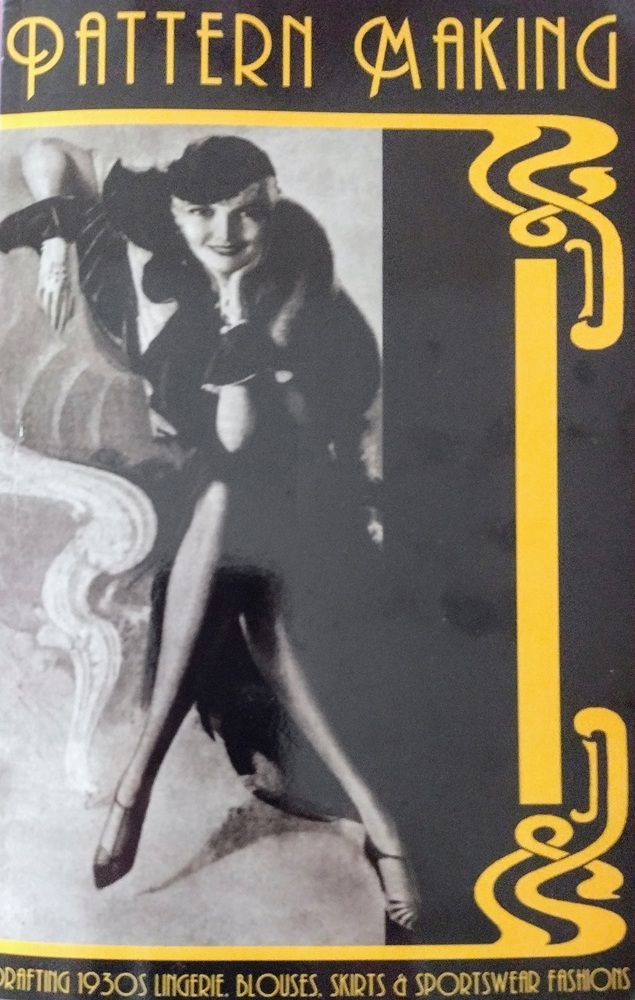
I bought this book through Amazon under the title “Pattern Making: Drafting 1930s Lingerie, Blouses, Skirts & Sportswear Fashions” by Gertrude Mason. The book was originally titled “Gertrude Mason’s Pattern-Making Book” and published in the U.K. in the 1930s. Ms. Mason was, according to the title page in the reprint I purchased, “a lecturer demonstrator in needlework, dressmaking and tailoring under the Board of Education, The Birmingham Education Committee and the Kent Education Committee.”
This book may have been part of demonstration materials or course materials for Ms. Mason’s work. In a demonstration or class, there would be hands-on exposure to fitting challenges or times when the resulting pattern did not conform to the examples given in the book. Explanations would be provided. That is why I think this book was intended for such use. It is not the kind of book that makes fitting and altering the results easy for the beginner. This book also lacks a personal touch that would guide the patternmaker along the way. There is little introduction or explanation at the start of each chapter. Instead the reader goes right into instructions for drafting each pattern. The approach is step by step, along with clear illustrations of the resulting pattern. However, at no time are any comments or notes given to explain what should be done if the resulting pattern does not turn out as illustrated.
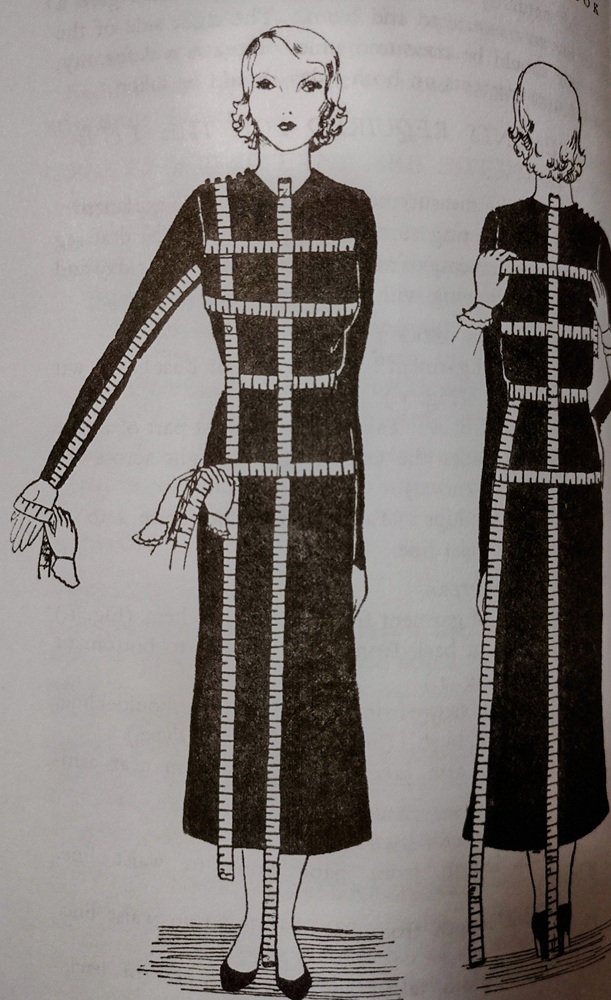
My review is based on my personal experience using the drafting system and pattern transformations in this book. I followed the chapter on taking measurements using my Wolff professional dress form size 8. The basic patterns for what is called The Magyar and the simpler wraps turned out acceptable, but not outstanding. The results were very loose and could easily be made using a modern day sloper and transforming for a mounted (a/k/a grown-on) sleeve. These early patterns are all unfitted, boxy and without darts. Tucks, pinch pleats, and shirring could be added as shown in the illustrations, but no written instructions are provided.
I then tried drafting the basic skirt pattern using the measurements from my Misses Size 8 dressform. Following the instructions I ended up with a very large back dart on the skirt. I divided the width into three separate darts. Still the skirt did not fit well across the front. The front ended up not being dartless but needing one dart on each side of center front. The resulting skirt was wide at the bottom but did not have the flow and movement of a modern A-line or flared skirt.
There must be adjustments that could be made but overall I did not find the effort worthwhile. I used up a lot of pattern paper and muslin to test the results of this patternmaking system. I could have adapted my modern slopers. Each chapter has a set of measurements used as an example for drafting each pattern. The calculations for each step are also provided. The basic body measurements used in the book are close to a Standard U.S. Misses Size 8. I may revisit this book and use those measurements to draft the patterns. I could then alter the toile to fit my modern Wolff size 8 dress form. From that I could make a sloper. That is one route others can take if they are interested in standard sizes and slopers.
This book does have value for the historical information it provides. Also the illustrations of the transformations can serve as a guide to drafting or adapting any modern patternmaking system to get similar results. In the end, I think it is more important to achieve perfect fit with a vintage look than having to use a vintage pattern drafting system that results in poorly fitting clothes or results that can be easily reproduced with a modern drafting system with perfect fitting.
Emily Wilkens was an American designer who came to prominence during the 1940s. What Emily designed at that time was considered new, innovative and an important development in the fashion industry. Until the late 1930s-early 1940s, clothing for pre-teens mirrored the clothing for little girls. Teenage girls between the ages of 13-19 had choices, although not attractive ones for their developing figures and personalities. Some designers created clothing sized for the teenage body but that looked very much like that of a little girl’s outfit. Other designers worked with inspiration from the clothing for mature women and sized them for teenage girls. The result was that there was little that was fresh and new until Emily Wilkens set her focus on the developing teenage market.
Emily Wilkins’ Contributions to Fashion
Original sketch and dress with smocking for teenage girls, designed by Emily Wilkens.
“Young Originals” is as much the story of Emily Wilkens as a designer as it is about the birth of her design label Young Originals.
Researcher and writer Rebecca Jumper Matheson has created a book that is informative and exciting to read. She presents an excellent view of the market forces that brought the teenage girl into focus and made her the center of Emily’s design vision. Teenagers were coming into their own by the 1940s and were emerging as a separate market with unique needs and desires. Emily was part of this trend that marked a definite break with the past.
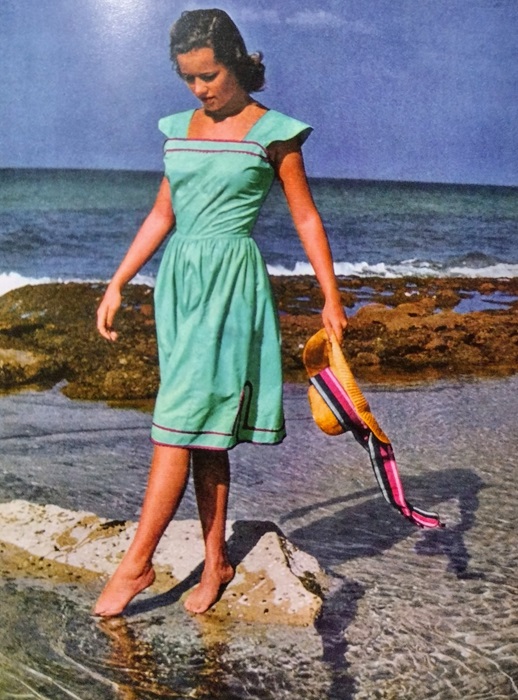
Tee Matheson was one of Emily’s favorite teenage models during the 1940s.
Emily’s ideal model was healthy and radiated a confident beauty. She did not need much make-up, jewelry or fancy hairstyling. Well fitting clothing, tasteful accessories and attention to healthy hair, skin and body were what mattered. Emily sought to free the teenage girl and young woman from the artifice put before the public as a standard of beauty. The famous actress of Hollywood was not an image for Emily. Instead she wanted teenage girls to look at themselves in the mirror and work with what would be most flattering to them.
Evening gown for a teenage girl or young woman, by Emily Wilkens.
Although she set a new trend, Emily’s fashions were very modest when we look at them today. In fact from our vantage in time they do not seem as they did when they made their debut. If anything some of Emily’s dresses look a bit too little girl and not enough for the young woman developing during the teen years. Still there is a fresh, easy going quality to her designs that can be adapted to the styles of the past that inspire modern sewistas, patternmakers and hobbyists.
Sketch of one of Emily’s designs.
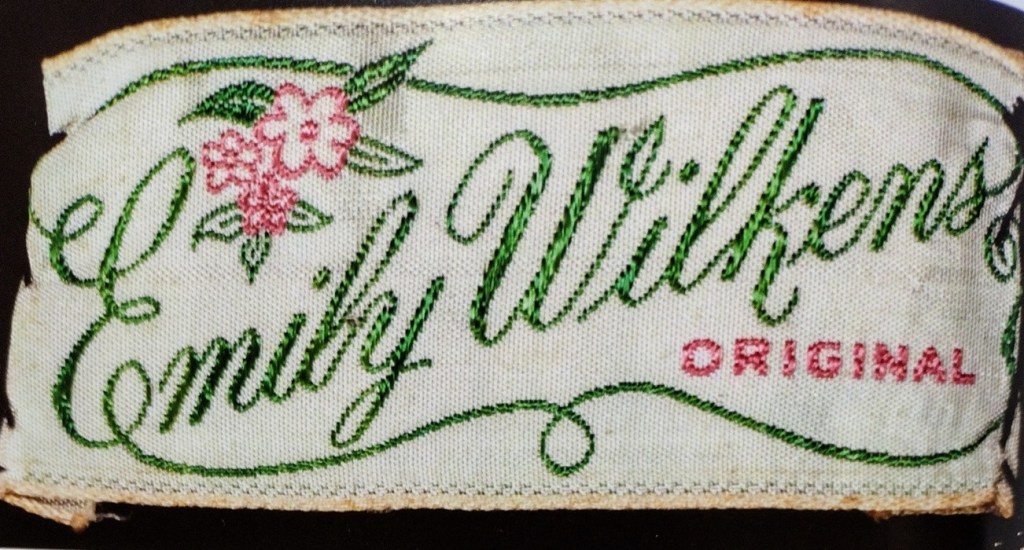
The book contains many technical sketches of Emily’s designs, as well as photos from private collections. From a photo of an Emily Wilkens label in this book, I got an idea of how I wanted the labels made for my own dressmaking creations. I also like the details on some of her dresses like the bows and appliques. Her use of gloves and handbags also inspires me when I need to draw on how accessories made her total look for teenage girls unique.
Label used for Emily Wilken’s designs.
I recommend this book to dressmakers and hobbyists with an interest in fashion history. You will learn how the market for teenage clothing for girls and young women started. This knowledge will enrich your understanding of how fashions for this market segment continued rapid growth during the 1950s, 60s and beyond.
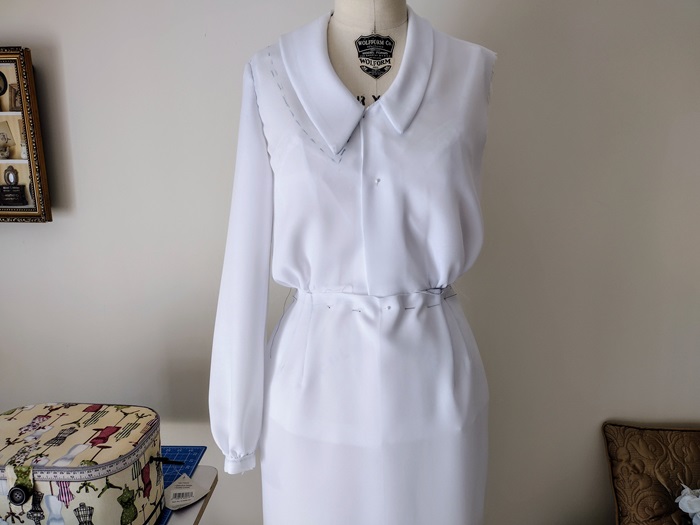
The fitting toile for my 1930s Inspired Skirt and Blouse is finished. I am now thinking of a name for this outfit. I have to research popular women’s names during the 1930s. When I find the one that resonates with this outfit that will be the name I choose. This usually happens after I have completed selecting accessories and lingerie to complete the look.
Please note that the sloper and the pattern are not copies of 1930s patterns or created using a 1930s patternmaking system. I used a modern patternmaking system to save time and because the resulting fit meets the needs of the modern woman for comfort to move and ease in putting on and off.
Details of the Fitting Toile for the 1930s Inspired Skirt and Blouse
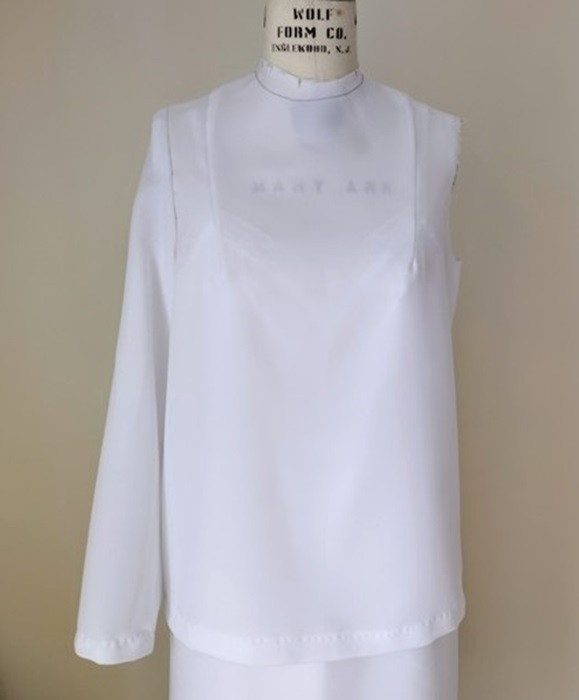
One of the difficult details for me in recreating a 1930s inspired blouse was training my eye and mind to accept a wide, flat fitted collar. On the right hand side of the collar in the photo is the narrow collar I started with. I thought this would look better. As I thought about it I realized that I am thinking too much of the narrow Peter Pan collars of 1950s dresses and blouses. I have experience with those, but not with the bolder, wider styled collars of the 1930s.
To attune my eye so that I created the right width I drafted a wider collar and made a toile from that collar pattern. I then pinned it over the left side shown in the photo. I gave myself time to visually accept the comparisons before making a decision. In time I realized the wider collars felt right and looked better for this style of blouse. So with that the wider flat fitted collar was chosen.
Note: Collar on left is wider than collar on the right. The comparison was made to determine the best width for the overall look of the blouse.
Have you ever noticed how many vintage pattern illustrations from the 1930s and 1940s show blouses with smooth lower portions that look like peplums? Not every blouse with this lower portion that looked like a peplum was indeed a peplum. It was actually a blouse yoke, a feature that is still used in French couture today. The blouse yoke is made from a basic pencil skirt pattern with length equal to distance from waist line to hip line. One or both darts are open to create a very slight flare. The yoke is adjusted during fitting to come a little closer to the hip curve.
The upper portion of the blouse runs from the neckline to waistline. The waist is sewn to the yoke after the bodice side seams are finished. When the skirt is put on, the yoke holds the blouse in place. It also provides a nice fullness and smoothness for the skirt to flow over the hips.
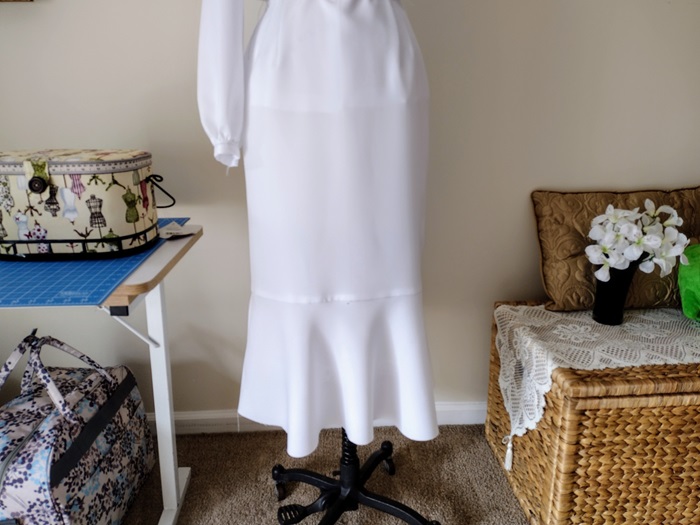
The flounce pattern is derived from cutting a length off the upper skirt pattern. Front and back are evenly divided and opened an equal amount for the slashes. Here is an important tip I learned from trial and error: measure the width of the hem at front and back. They should be equal. Otherwise the flares will look uneven. To get the best and softest flow and movement, cut the flounce at center front placed on the fold of the true bias. This takes more fabric but the result is very beautiful. The flounce can also be cut with center front on the lengthwise grain. There will still be flare but not as much as when cut on true bias.
The skirt will have a 1/2″ to 3/4″ waistband backed with Ban-Rol. This gives a smooth look and fit. The result is that the waistband has an effect similar to a belt. The skirt fits better and the waistband never rolls or bends as it would without interfacing or a non-woven interfacing that is washed or dry cleaned many times.
Over the past six months I’ve been downsizing my library of dressmaking and patternmaking books. I’ve also given away household items like flatware, tableclothes and cloth napkins. Each time the response has been uplifting. The new owners exuded an enthusiasm and happiness that I received as well. All items were released back into the world without any price tag attached. That the new owners drove some distance to come to my location touched my heart. Here were people who believed in continuing to use things that still served their purpose.
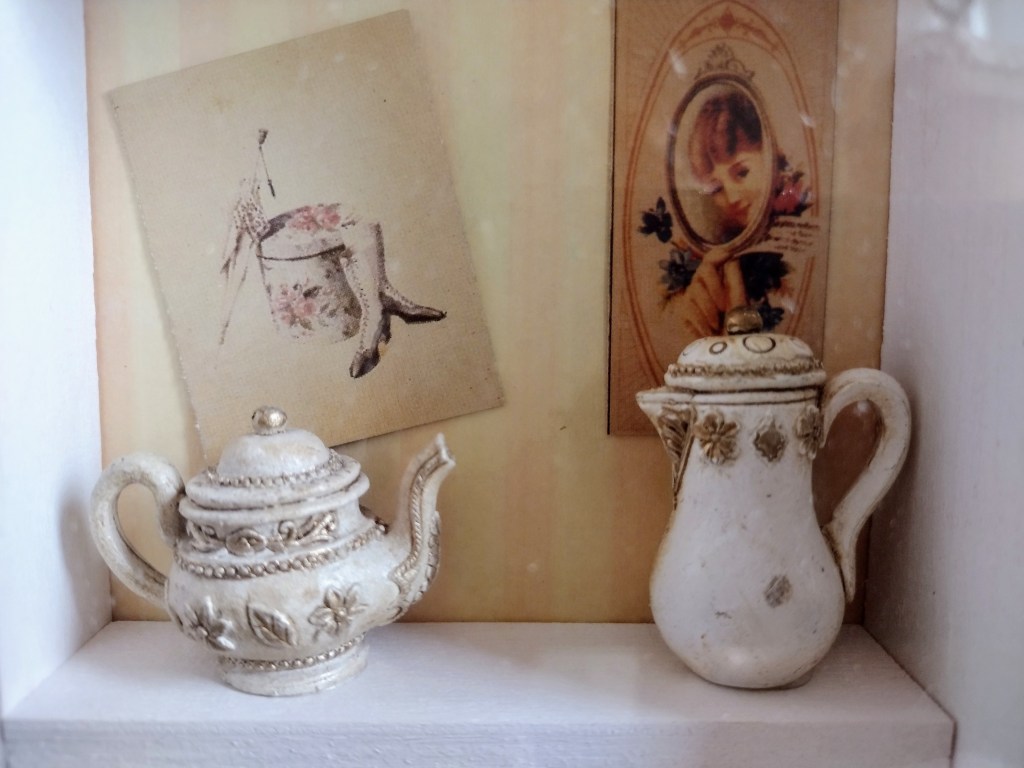
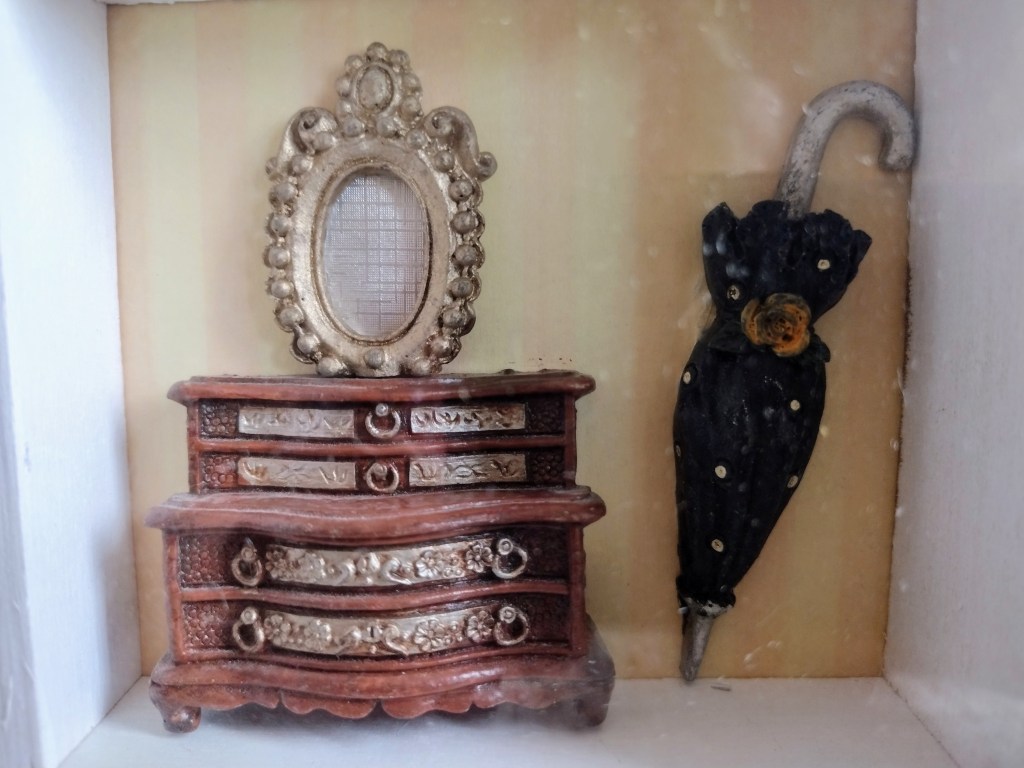
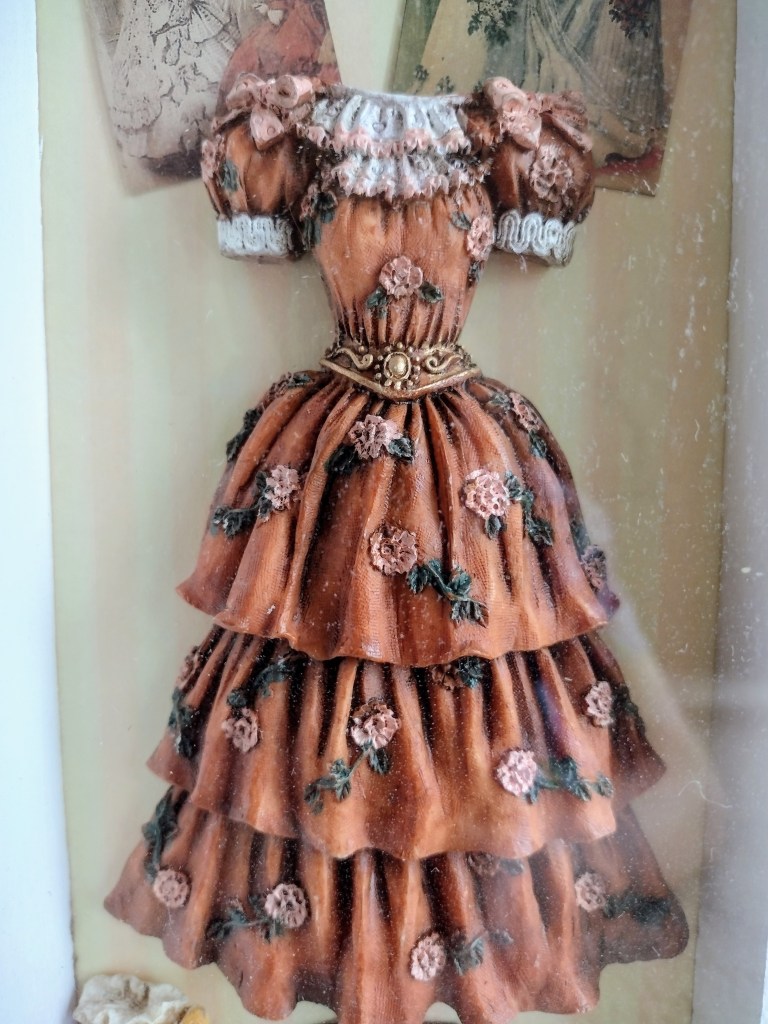
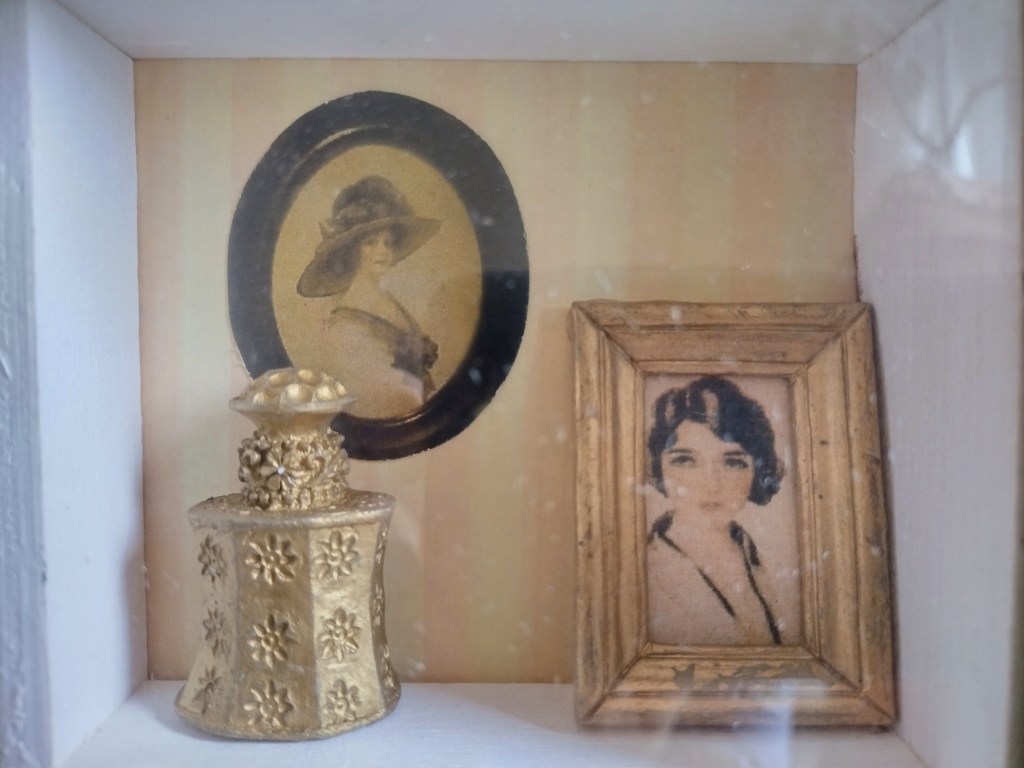
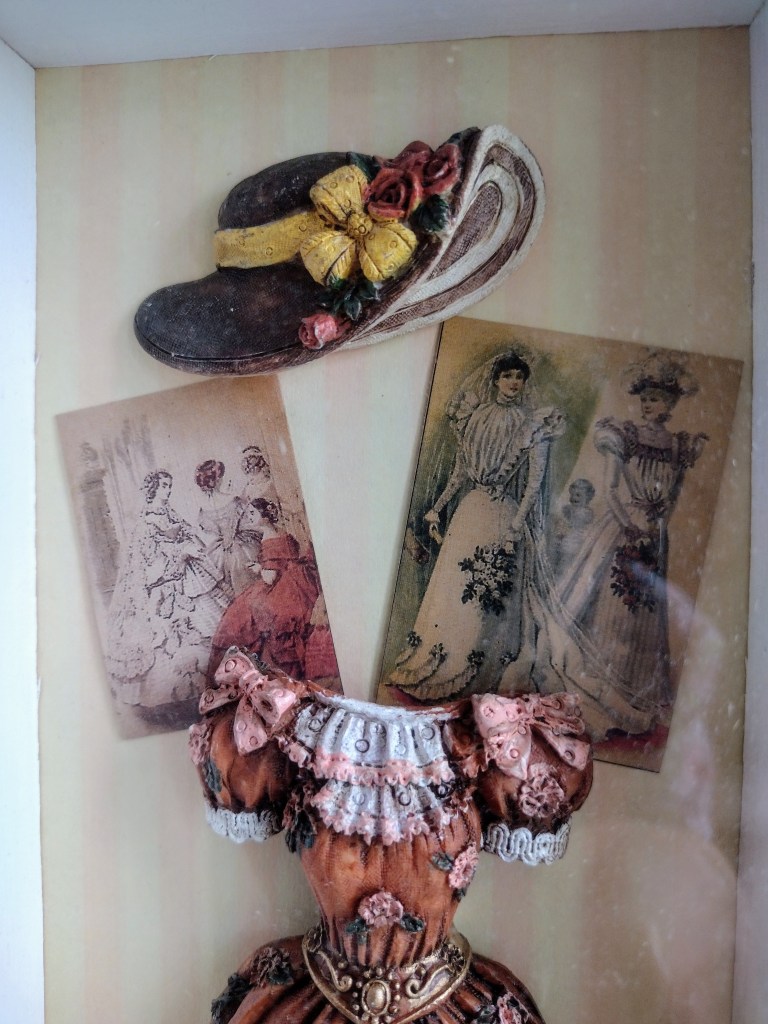
Last night I came home to find this shadowbox on the table in the lobby of the building where I live. After the super confirmed a tenant left it there as a freebie, I claimed this for my own. I’m going to hang it right above the table where I sew and draft patterns. It unifies that corner of the room into a statement. Now I feel the sewing corner has a strong visual and emotional impact. As someone who loves taking inspiration from the past, be it fashion or tea time, this shadow box is rich in meaning on so many levels.
My advice is if there are fabrics, notions, books you no longer want, need and use pass them on. By clearing out space, you are making room for more goodness, abundance and happiness to enter your life. I am looking forward to how this is expressed in my sewing in the days and weeks ahead.
This week I reviewed the first sketch made for my next project, a 1930s inspired skirt and blouse. I do not have much experience working with styles of this decade, so it is a big challenge for me. I have only made one dress using design elements from a 1930s book, Paris Frocks at Home. That dress was designed as what I envisioned a woman would have as a special occasion dress during the Great Depression. It was pretty enough for a semi-formal occasion and yet could be worn for more everyday events such as a Sunday visit.
With my new project I am envisioning how a woman would dress for work during the 1930s. I want the skirt and blouse to be pretty and attractive enough to be wearable for today. For this reason I am taking only certain elements from the 1930s, not all of them.
I re-thought the first sketch and was not satisfied with it. I will detail the reasons here while sharing the importance of maintaining a clear focal point for any design.
What is a focal point?
A focal point is that part of the outfit where you want to:
–direct the gaze of the viewer –emphasize a feature and make it attractive –express an idea about the outfit, i.e. what is the message
Importance of integrating a focal point into the flow of the design
A focal point must be in harmony with the overall appearance and purpose of the outfit. It has to have pleasing proportions and add to the wearers attractiveness. Learning how to balance focal points takes experience. You want at least one, perhaps two. But never so many that the eye does not rest on any particular area and then move to what feature you are emphasizing. For example, in Version 1 of the 1930s outfit there are, I think, conflicting focal points. The scalloped yoke of the skirt competes with the bow of the blouse.
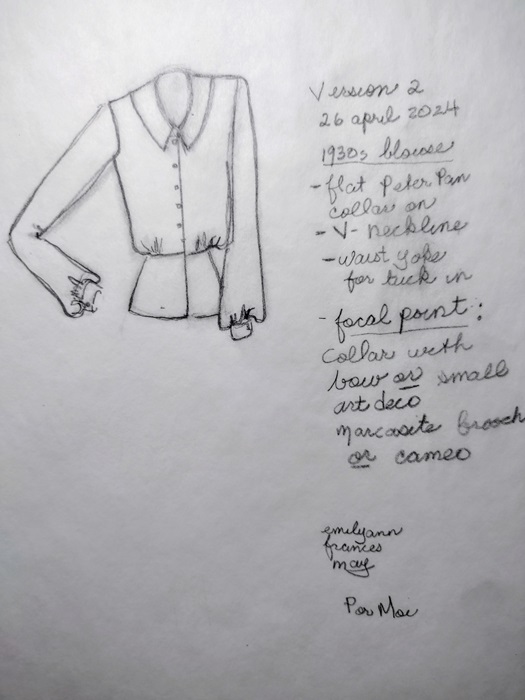
Version no. 2 of the skirt and blouse appears more calm and pleasing to the eye. The flounce at the bottom of the skirt emphasizes the movement when the wearer walks. A second focal point is the v-neckline of the Peter Pan flat collar. A small, marcasite Art Deco broach can be pinned at the neckline to create a second focal point. Or, very pretty but small buttons may be used to create the second focal point. Here there is a more sublte play between the focal points that Version no. 1 lacks.
How to compare focal points and choose the right combinations
One way to choose the right combination of focal points, or choose to have just one focal point, is to make separate sketches of the parts of the outfit. Then make a complete sketch of the outfit put together.
1930s skirt and blouse sketches and notes, Version no. 1
1930s skirt and blouse sketches and notes, Version no. 2.
If doubts remain about the current pairing of separate parts of the outfit, the sketches of the garment pieces can be mixed and matched. This gives some idea on how the elements might or might not work together in a different combination.
Blouse Ver. no. 2 is paired with Skirt Ver. no. 1 on the left. On the right Blouse Ver. no 1 is paired with Skirt Ver. no. 2.
It helps if the sketches are put aside for a day or two. Then they can be reviewed again with a fresh point of view. When performing this review, be aware of what first captures your attention. Then consider how that first focal point works with other elements in the design.
Through this process of sketching, considering, studying and planning you will come up with an important and clear definition of how to proceed in the next steps of your design plans.
My final choice: Version no. 2
Additional Resources
To learn more about focal points in fashion please visit:
UEN Utah Education Network Emphasis_the_Focal_Point_of_Fashion_1_.pdf Scroll down and on the right side of the screen are free course materials you can download that will help you understand what the focal point is about.
Here are some ideas for my next patternmaking and sewing project. I will use the 1930s inspired sloper I just finished.
Complete outfit
Blouse made with white crepe or dull, silky fabric in white.
Bias cut bow in pale pink.
Skirt in mid-weight fabric like gabardine or linen-like wrinkle free fabric.
Accessories: The bow and pearl earrings.
The Blouse
Blouse has waistline yoke. This is not a peplum. It is a feature that was common in blouses of the 1930s through 1940s. The lower portion is tucked into the blouse. The yoke creates a smooth look under the skirt.
All dart intake and style ease will be gathered into the waist of the yoke.
Flat Peter Pan Collar of Peter Pan Collar with a slight stand.
Bow is bias cut and goes under the collar. Tied into a bow at center front.
1/2″ buttons. Maybe mother of pearl. Depends on the fabric.
Slightly puffed Bishops Sleeves at cuff. 1″ cuffs. Use the fitted sleeve with vertical dart as the basis.
Yoke length from waist to a point between abdomen and hip.
The Skirt
Skirt length: 28-30″ from waist
Hem to be finished with 2″ wide hem lace.
8″ zipper at center back.
Underline yoke of skirt so that a hidden zipper can be sewn by hand at center back.
Flounce is cut in the bias at center front and back.
Skirt yoke is placed on top of flounce and top stitched into place.
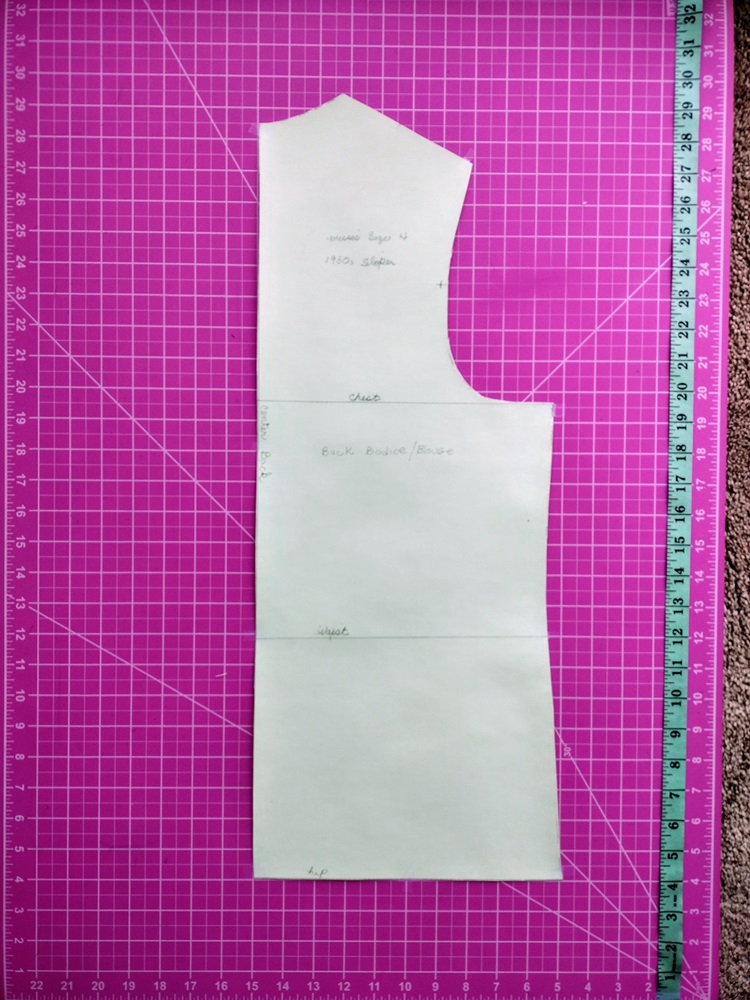
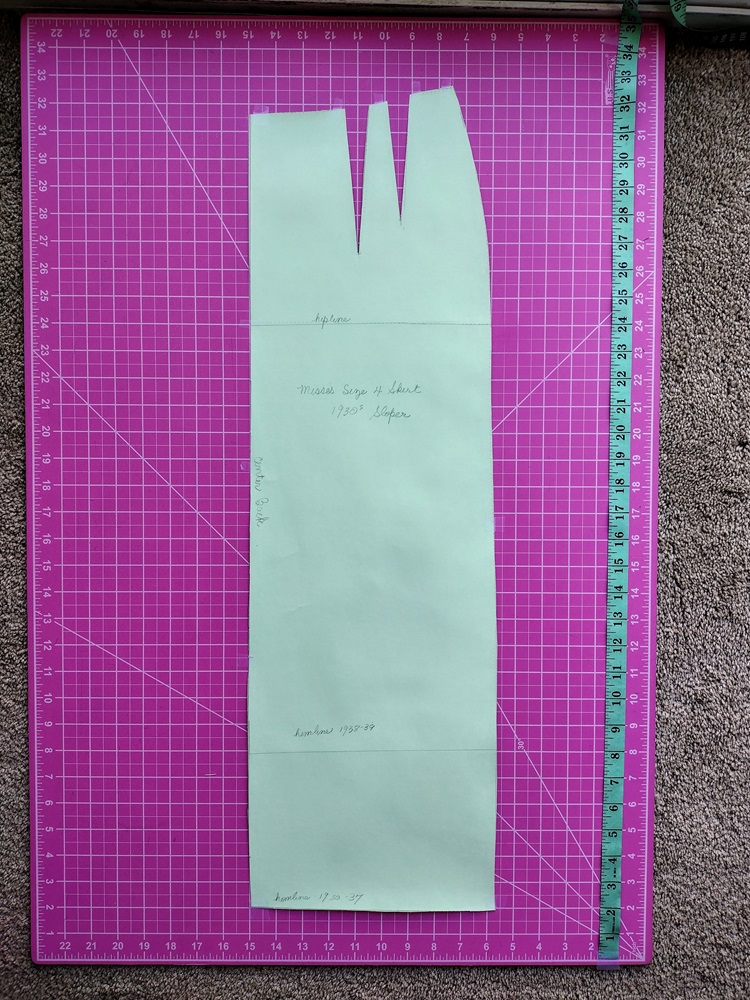
I am happy to share with you my hand drafted slopers that can be used to create styles with a 1930s feeling. The slopers are in a Standard Misses Size 4. The patterns were drafted with 3″ of style ease added to upper arm, chest, bust, and hips. The waist has 1 1/4″ ease added.
I did not use a period drafting system to save time. Instead I used the French Fashion Academy drafting technique which I learned in school. I think the results come close to capturing the pattern shapes in the 1930s drafting and sewing books I used for reference.
I release the slopers into the commons. The photos may be downloaded and used in a graphics program like Adobe to refine, grade, print and use as you please.
Research used: 1930s Pattern Cutting and Sewing Books
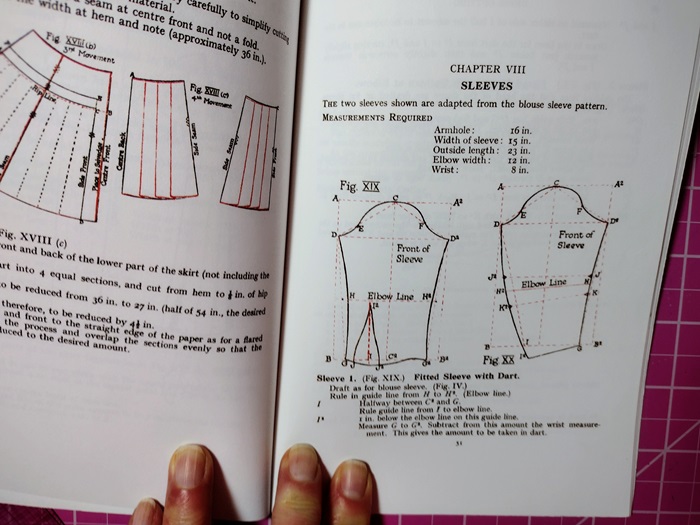
For the pattern shapes I used Dress Cutting by Margaret Ralston. Here are diagrams from the book for the bodice, sleeve and one of the basic skirts.
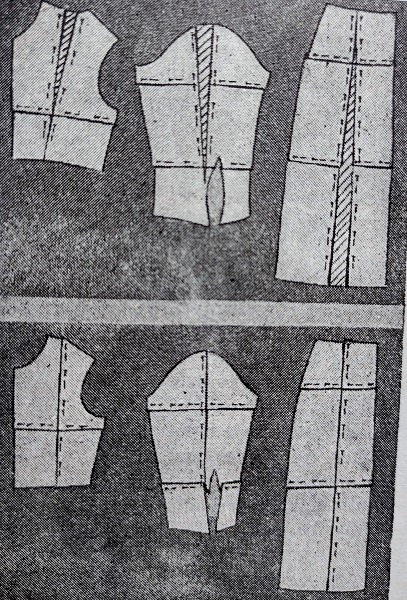
I referred to illustrations in Weldon’s Encyclopedia of Needlework as an additional step in learning about the shapes of basic patterns during the 1930s. Here are some illustrations from the chapter about fitting:
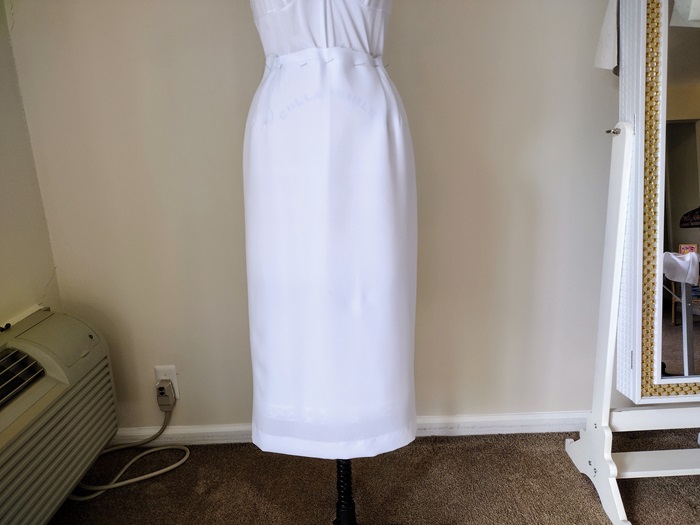
The results I obtained differ from the illustrations. The straight skirt is not as form fitting as a modern pencil skirt. The curve over the hip is softer and the skirt falls straight from the abodomen down. This is why I call it a “slim skirt”. I like the fit as it is not tight and it is not that form fitting in front or back.
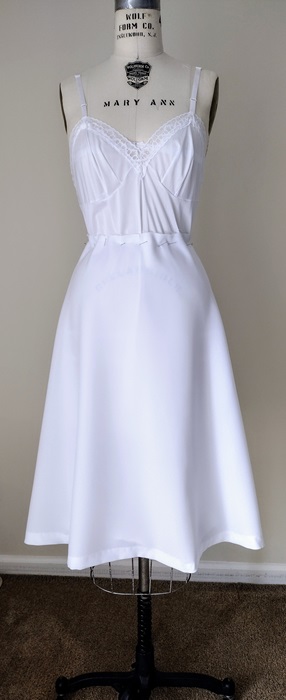
The slightly A-line and flared skirts do not fall as straight as the illustrations in Ralston’s book would have you think. I was surprised and pleased with the degree of flares each had. They are flattering and permit easy movement.
Hemline lengths differ during the 1930s
I bought scans of fashion illustrations from Etsy. These came from various sources and compiled by RetroKatDigital From the scans I saw that skirt lengths went to mid-calf length or lower from 1930 to about 1937. From 1938 to the end of 1939 hemlines went above mid-calf. The silhouette that became iconic during the 1940s was already evolving during 1938 and 1939. The shoulder line was more defined. The waistline was neatly nipped in and skirts had a more A-line shape that was less fluid, at least for everyday wear.
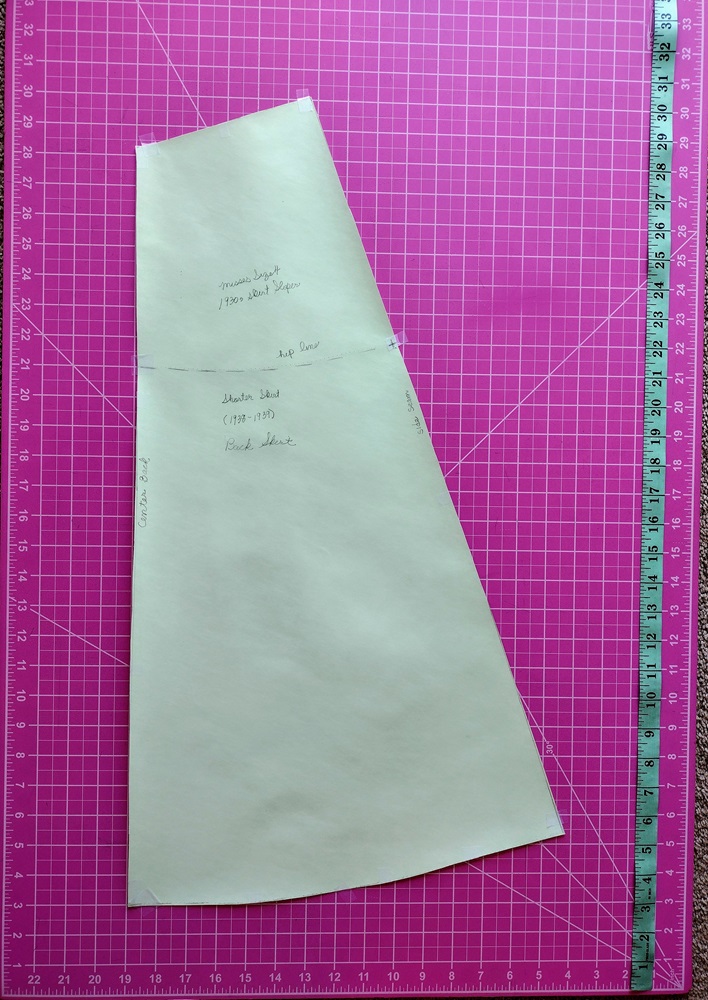
For this reason I marked two different hemlines on the slim skirt sloper. The shorter hemiline is for 1938-1939 inspired styles. The longer hemline is for styles influenced by fashions from 1930-1937.
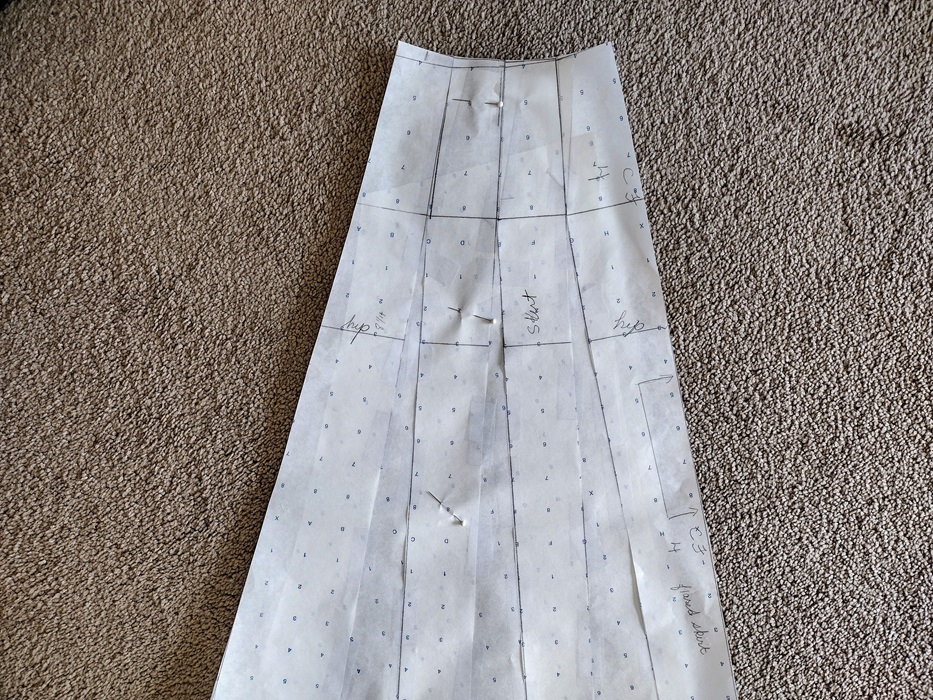
I made a mid-calf flared skirt for 1930-1937 influenced styles. The sweep at the hemline is greater than that of the shorter flared skirt to be used for 1938-1939 influenced styles. The shorter skirt also has less flares.
The Bodice-Blouse Sloper and Fitted Vertical Dart Sleeve
The sloper for the bodice-blouse ends at the hipline (8″ below the waist). The waistline is also marked. This way the sloper can be used for a blouse or the bodice of a dress. I chose an unfitted sloper because this shape agrees with what Ralston shows in her book. When used for a dress, the extra style ease can be gathered into the waist. Another approach is to make a toile, and then drape in tucks or small darts.
The vertical dart in the sleeve can be transformed into gathers that fit into a cuff. The effect is a very modified Bishop Sleeve. The sleeve can also be transformed into a sleeve with a point at the wrist. It can be cut above the elbow to make short sleeves, flared sleeves, bell sleeves and other kinds of sleeves.
Special Notes
–The measurements used for the sloper are the Basic Misses Size 4 plus 3″ ease to chest, bust, hips, and upper arm. The waist has 1 1/4″ ease.
–Always make a muslin to customize the fit or check that it is in line with the size 4 you use.
–Seam allowances of 1/2″ to 5/8″ must be added when cutting.
–The French Fashion pattern making system moves side seams of tops, bottoms and slaeves 1/2″ to the back of where the side seam is on the form or where it would be in mass manufactured clothing. This is done to create a better fit.
–The toiles are fitted over a one piece slip. This enables me to determine if the final fit has enough ease. It also improves the look of how the garment will drape over the form.
The Sloper: Unfitted Bodice with Fitted Sleeve (vertical dart)
I am making a series of slopers based on basic patterns created in the 1930s by Margaret C. Ralston. Her drafting system and pattern transformations were published in a book entitled Dress Cutting.
I am using the pattern drafting system that was taught at the French Fashion Academy. I find this system more suited to making retro inspired clothing., rather than using a vintage pattern drafting system. This route saves me time and makes the process more enjoyable. Ralston’s instructions sometimes make no sense to me. For example the sleeve seam is 3/4″ to the front of the bodice, meaning the sleeve seam will not match the side seam of the bodice. In the instructions for transforming a skirt pattern, she writes that sometimes a skirt side seam can be moved towards the back. I am sure this all made sense to her students and target audience at the time. However, I am not sure of how the results will look now and I do not have the time to go into that kind of nitty gritty effort to be authentic. So long as I can create a pattern and garment with a feeling and a little touch from a selected time period I’m quite satisfied. My goal is always to create a little bit of the look of retro combined with ease and movement of modern clothing.
The patterns for the 1930s sloper are drafted using the measurements for a Standard Misses Size 4. My vision is to create the building blocks of 1930s inspired styles that will look flattering on a smaller range of sizes. When completed the slopers will be put up at my blog. They can be best graded down to Misses sizes 0 -2 and upward to Misses sizes 6-8.
Three inches of ease at the hips and 1 1/2 inches of ease at the waist was added to the basic straight skirt drafted as the basis for this flared skirt.
Creating the flared skirt pattern and fitting toile
Cover of Dress Cutting (left) and pattern diagram for basic flared skirt. Notice how the flares begin at the hipline with overlapping of the pattern from waist to hip.
On the straight skirt pattern, the first dart by the side seam was closed halfway to give the skirt more ease and add a slight flare. The remainder of that dart was taken off from hip to waist.
Front of flared skirt pattern.
To create the flares the dart intake closer to center front was divided in half. I then drew two new darts equidisant with each having half of the intake. Then I added another slash line. The darts were closed and the third slash line opened. This reduced how high the flares would form. I repeated the same steps for the back skirt pattern.
Fitting toile of flared skirt.
As you can see from the fitting toile this is a very softly flared skirt. The flares begin below the abdomen and the sides fall straight. It feels true to the spirit of the 1930s when dresses were soft and there was lots of flare and movement created by insets, godets and the way in which the grain was used for a blouse, skirt or dress.
As of the date of this posting the skirt has been pinned to the form or 48 hours. I take this step to let the grain settle prior to marking and then putting up the hem. Sometimes I leave it hanging 72 hours. I highly recommend taking this step. Your finished toile will then reflect the way the flares look when hemmed. You will also know if you lose any length due to the way the grain settles. This skirt when finished and hemmed should have a center front length of 27-29 inches, in keeping with the longer skirt lengths of the 1930s.
























You must be logged in to post a comment.