Featured

Q&A: Why My Pattern Booklets Have a New Home at WordPress

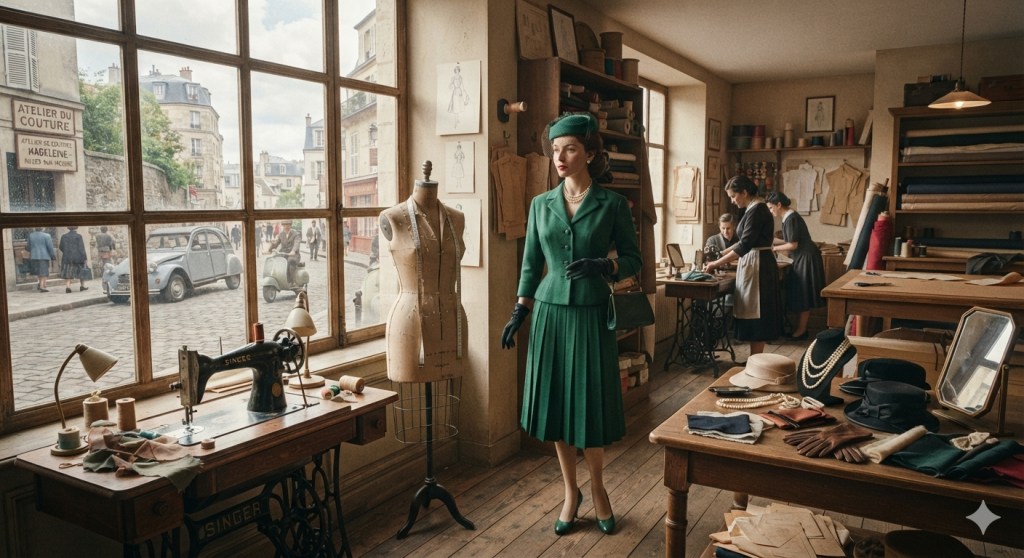
Illustration: my collaboration with Gemini and Nano Banana.

Q: Where are the new high-fashion sewing pattern booklets hosted?

A: All of my original, hand-drafted pattern booklets, comprehensive 21-page instructions, and grid photographs are now hosted permanently right here on my WordPress blog for free download under a Creative Commons license.

Q: Why were they removed from the global repository, Wikimedia Commons?

A: The submission was technically determined to be “out of scope” because Wikimedia Commons is built to host raw individual media files rather than formatted, self-contained instructional PDF booklets. I freely acknowledge that their technical layout rules were outside my initial understanding.

Q: Aside from technical scope, what was the user experience like as a contributor?

A: The platform is incredibly difficult to navigate, hostile to new users, and deeply user-unfriendly. Instead of welcoming a good-faith donation of professional expertise, the interface and the volunteer review corps rely on automated warnings and preemptive dismissals.

Q: What are the broader institutional concerns regarding the platform?

A: There is a severe, systemic lack of diversity (DEI) and a distinct absence of female editors, creators of color, and diverse international nationalities among their administrative gatekeepers. Furthermore, there is zero awareness of accessibility needs. When creators utilize essential adaptive tech tools—such as voice dictation to navigate physical limitations like chronic tendonitis—the platform treats these workflows with suspicion and summary rejection rather than inclusion.

Q: How will the patterns be distributed going forward?

A: This blog operates on a decentralized, open-source honor code. The original high-resolution cell phone photographs of my patterns on a 1-inch cutting mat are uploaded completely untouched and unaltered. They have been meticulously tested and fitted on industrial Wolf dress forms. It is up to graphic-savvy, Adobe-trained makers to download, scale, and refine them to make them their own. It is a completely independent, respectful, and self-service legacy for the sewing community.

A Final Note to Fellow Creators

To all the illustrators, models, designers, and pattern makers out there: Do not upload your original works to Wikimedia Commons. The platform is simply out of scope for the deep, technical value you create. More importantly, you do not deserve to be subjected to unpleasant, hostile interactions or to have your hard work subjected to arbitrary deletion by anonymous gatekeepers. You are better than that. Your talent, time, and intellectual property are far too valuable. Instead, seek out more wonderful, decentralized formats like an independent blog, where you maintain absolute control over your art and your legacy.

Workflow Transparency Statement: The idea for this posting was conceived by me. I dictated the draft into MS Word. Gemini AI was used as an editorial tool to finalize the text. The illustration is a collaboration of my descriptions and knowledge of fashion, given expression through Gemini and Nano Banana.


I release this illustration into the commons. It may be reused for educational purposes and to train AI.

Why My Patterns Have a New Home at WordPress: A Statement on Community, Ethics, and Accessibility

A 1950s Parisian dressmaker's atelier in a sunlit attic room. A stylish schoolgirl's outfit is displayed on a dress form next to a 1950 model Singer sewing machine in a cherrywood cabinet by the window. An old-fashioned treadle sewing machine is set against the left wall, with a pattern-filled table and shelving units holding sewing supplies nearby.

Illustration: My collaboration with Gemini and Nano Banana.

Free Pattern Downloads for All

I have decided to bring my original pattern booklets permanently to my WordPress blog for free download under a Creative Commons copyright license.

For anyone downloading these booklets, you will see a notice on the very first pages. By downloading my work, you agree to abide by this Creative Commons license. It is an honor code all the way through—a commitment to giving back to the craft. This framework provides you with immense latitude and room for your own creativity, while ensuring the foundation of the work remains respected.

Going forward, all of my pattern releases will be packaged into comprehensive booklets featuring full instructions, encouragement, affirmations, and a brief history of the garment.

Understanding the Format: A Resource for Savvy Makers

It is important to understand that these are not commercial, mass-market sewing patterns. You do not send these files to a print shop. Instead, these are photographs of my original, hand-drafted patterns laid out on a 1-inch grid cutting mat.

These are the original photos taken with a cell phone camera and uploaded directly. They are completely untouched and are not altered in any way. It is entirely up to those with Adobe Illustrator or standard graphics editor experience to make their own adjustments, scaling, and digital cleanups. Most importantly, every single one of these patterns has been meticulously tested and fitted on a professional dress form before release. Once you download that image, use the 1-inch grid guide to scale it to 100% true size, and begin tweaking it, that pattern becomes yours. You are putting in the work.

That is the true definition of community and open source. The design will evolve as fellow makers refine it, alter it, and change it to suit their needs. It is no longer just my pattern—it belongs to everyone who uses it.

Why This Move Was Necessary

Recently, I attempted to share my original resources on a massive public repository in good faith. My goal was simply to donate these high-fashion, industrial Wolf-form blueprints to the global creative community.

Unfortunately, the experience was deeply disappointing. Instead of being welcomed, my professional work was summarily and preemptively flagged for deletion. The platform’s rigid, automated system and narrow gatekeeping demographic dismissed the material out-of-hand without checking my transparency statements or examining the raw photographs of my physical cutting mat.

Because of this exclusionary culture—and a stark lack of diversity among the platform’s administrators—I have officially requested the permanent deletion and withdrawal of all my files from their site. I choose to stand in good company and will not donate my decades of professional training to a platform hardwired to alienate creators.

My Resourceful Workflow and Ethical Tech Use

I want to be entirely transparent about my creative workflow, as discussions around technology are highly pertinent to modern artists. I am working on a limited budget, and in order to expedite the distribution of my patterns, I use what is readily available to me: my cutting mat with a 1-inch grid and my cell phone camera.

Because I cannot afford a professional studio or a photographer, I photograph my dress forms in my living room during the fitting process and upon completion. My home environment does not have optimal studio lighting. To resolve this for the instructional imagery showing the finished garment or the toile as it is being fitted, I use AI tools ethically only to refine the background environment.

The garment itself is entirely untouched. The drape, the hang, the fit, and the way the fabric looks are 100% authentic and completely unaltered. The technology is used strictly as a digital cleaning tool for the surrounding room, which is the most expedient way to create clean, professional resources while ensuring the final file sizes are not too large to distribute online.

Furthermore, due to physical challenges and chronic tendonitis flare-ups, collaborating with assistive digital editors allows me to bring my dictated text to life without overextending my body. I work slowly and mindfully on the days I am physically able. To summarily dismiss original, hand-drafted intellectual property simply because a creator utilizes modern adaptive tools is a form of systemic exclusion that alienates contributors with physical limitations. Good-faith work should be evaluated on its structural validity and original intent, rather than being rejected due to a lack of understanding regarding accessible creation methods.

Those who are savvy and understand the workflow of ethical AI use will embrace this method, recognize the precision of the underlying work, and make it their own. I refuse to be part of the current witch hunt or blanket condemnation of these tools. When used ethically to support human artistry and accessibility, they are invaluable. It is no different from a traditional author collaborating with a human editor to refine and reshape their drafts.

At the same time, I believe deeply in a balanced life. The next generation must be grounded in critical thinking and rich, real-world experiences completely outside of a computer screen. True progress means building a culture that welcomes these balanced, accessible workflows rather than reacting with fear and summary dismissal.

Leaving a Legacy

There is absolutely no money exchanged here. This move is driven entirely by my desire to leave a meaningful legacy. I want to provide a door of opportunity to those who love the art of dressmaking but may have limited financial means to access original, high-fashion drafting resources.

By keeping this space entirely self-service, I am giving you the raw materials—it is up to you to apply your own skills, intellect, and creativity to bring them to life. That is the empowering, collaborative spirit we are moving forward with on this blog.

Welcome to the collection. Let’s create something enduring together.


Workflow Transparency Statement: This posting was dictated into MS Word by me and reviewed. It was then run through Gemini, for refinement and condensing. I use Gemini and Nano Banana as accessibility and productivity tools. Due to tendonitis I limit how much keyboarding I do so my arms and hands can relax more. This enables me to keep my good days and movements free to work on what I love such as patternmaking, sewing, cooking and tidying up my apartment.


AI License and Creative Commons license: The illustration created for this posting may be reused for educational purposes and/or to train AI.

1930s Inspired Pattern Sloper and Toiles

Introduction

I am happy to share with you my hand drafted slopers that can be used to create styles with a 1930s feeling. The slopers are in a Standard Misses Size 4. The patterns were drafted with 3″ of style ease added to upper arm, chest, bust, and hips. The waist has 1 1/4″ ease added.

I did not use a period drafting system to save time. Instead I used the French Fashion Academy drafting technique which I learned in school. I think the results come close to capturing the pattern shapes in the 1930s drafting and sewing books I used for reference.

I release the slopers into the commons. The photos may be downloaded and used in a graphics program like Adobe to refine, grade, print and use as you please.

Research used: 1930s Pattern Cutting and Sewing Books

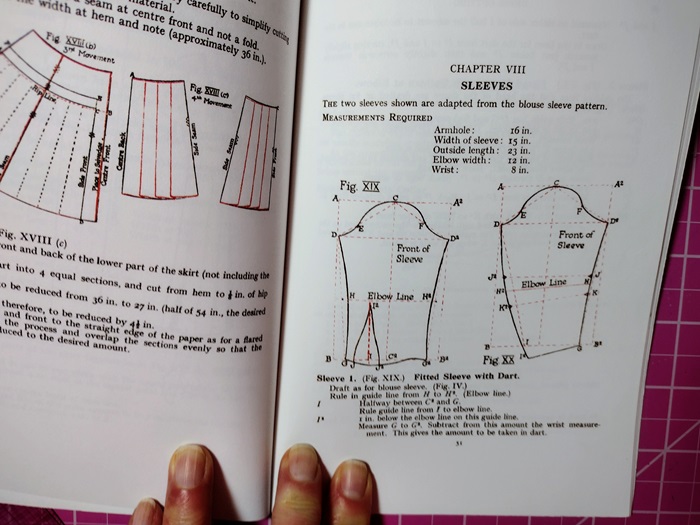
For the pattern shapes I used Dress Cutting by Margaret Ralston. Here are diagrams from the book for the bodice, sleeve and one of the basic skirts.

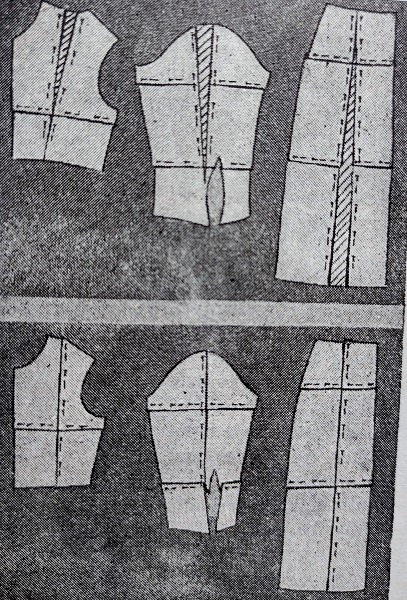
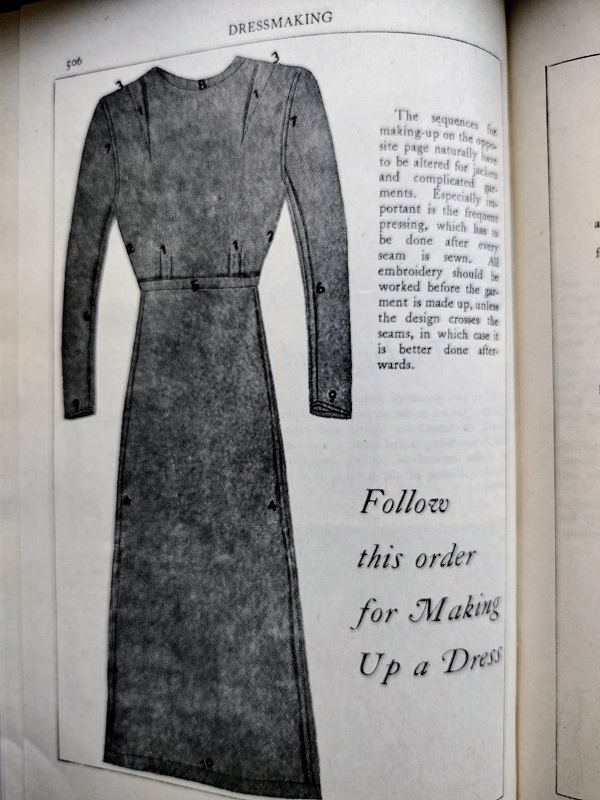
I referred to illustrations in Weldon’s Encyclopedia of Needlework as an additional step in learning about the shapes of basic patterns during the 1930s. Here are some illustrations from the chapter about fitting:

The results I obtained differ from the illustrations. The straight skirt is not as form fitting as a modern pencil skirt. The curve over the hip is softer and the skirt falls straight from the abodomen down. This is why I call it a “slim skirt”. I like the fit as it is not tight and it is not that form fitting in front or back.

The slightly A-line and flared skirts do not fall as straight as the illustrations in Ralston’s book would have you think. I was surprised and pleased with the degree of flares each had. They are flattering and permit easy movement.

Hemline lengths differ during the 1930s

I bought scans of fashion illustrations from Etsy. These came from various sources and compiled by RetroKatDigital From the scans I saw that skirt lengths went to mid-calf length or lower from 1930 to about 1937. From 1938 to the end of 1939 hemlines went above mid-calf. The silhouette that became iconic during the 1940s was already evolving during 1938 and 1939. The shoulder line was more defined. The waistline was neatly nipped in and skirts had a more A-line shape that was less fluid, at least for everyday wear.

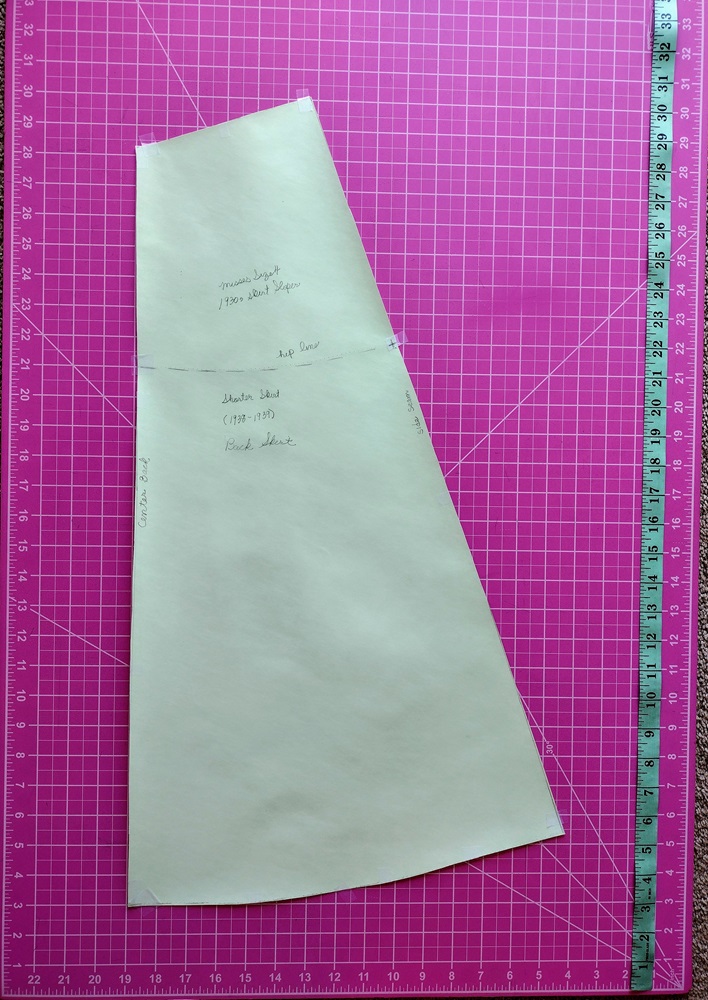
For this reason I marked two different hemlines on the slim skirt sloper. The shorter hemiline is for 1938-1939 inspired styles. The longer hemline is for styles influenced by fashions from 1930-1937.

I made a mid-calf flared skirt for 1930-1937 influenced styles. The sweep at the hemline is greater than that of the shorter flared skirt to be used for 1938-1939 influenced styles. The shorter skirt also has less flares.

The Bodice-Blouse Sloper and Fitted Vertical Dart Sleeve

The sloper for the bodice-blouse ends at the hipline (8″ below the waist). The waistline is also marked. This way the sloper can be used for a blouse or the bodice of a dress. I chose an unfitted sloper because this shape agrees with what Ralston shows in her book. When used for a dress, the extra style ease can be gathered into the waist. Another approach is to make a toile, and then drape in tucks or small darts.

The vertical dart in the sleeve can be transformed into gathers that fit into a cuff. The effect is a very modified Bishop Sleeve. The sleeve can also be transformed into a sleeve with a point at the wrist. It can be cut above the elbow to make short sleeves, flared sleeves, bell sleeves and other kinds of sleeves.

Special Notes

–The measurements used for the sloper are the Basic Misses Size 4 plus 3″ ease to chest, bust, hips, and upper arm. The waist has 1 1/4″ ease.

–Always make a muslin to customize the fit or check that it is in line with the size 4 you use.

–Seam allowances of 1/2″ to 5/8″ must be added when cutting.

–The French Fashion pattern making system moves side seams of tops, bottoms and slaeves 1/2″ to the back of where the side seam is on the form or where it would be in mass manufactured clothing. This is done to create a better fit.

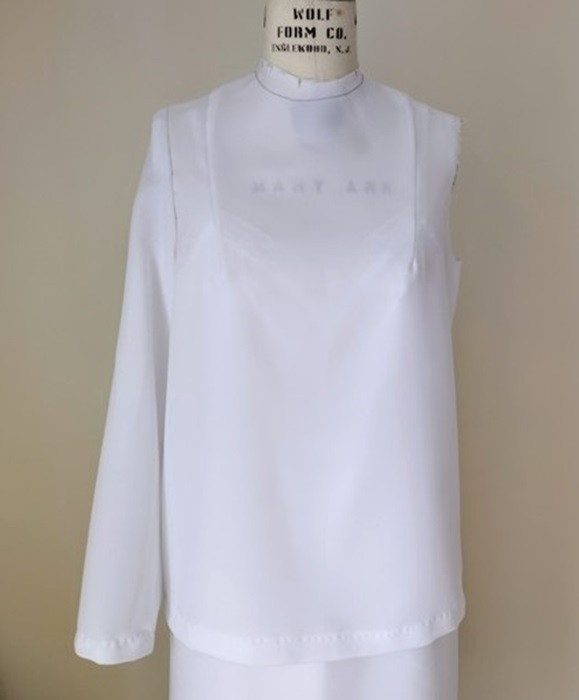
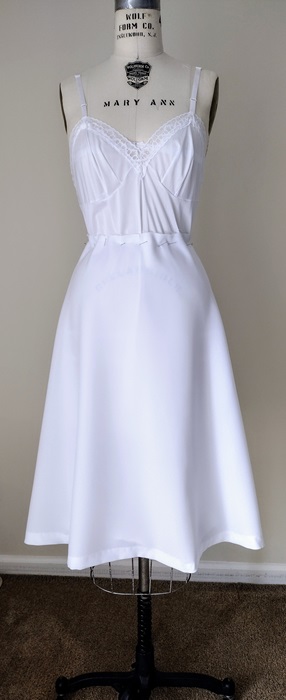
–The toiles are fitted over a one piece slip. This enables me to determine if the final fit has enough ease. It also improves the look of how the garment will drape over the form.

The Sloper: Unfitted Bodice with Fitted Sleeve (vertical dart)

Bodice-Blouse Front

Bodice-Blouse Front

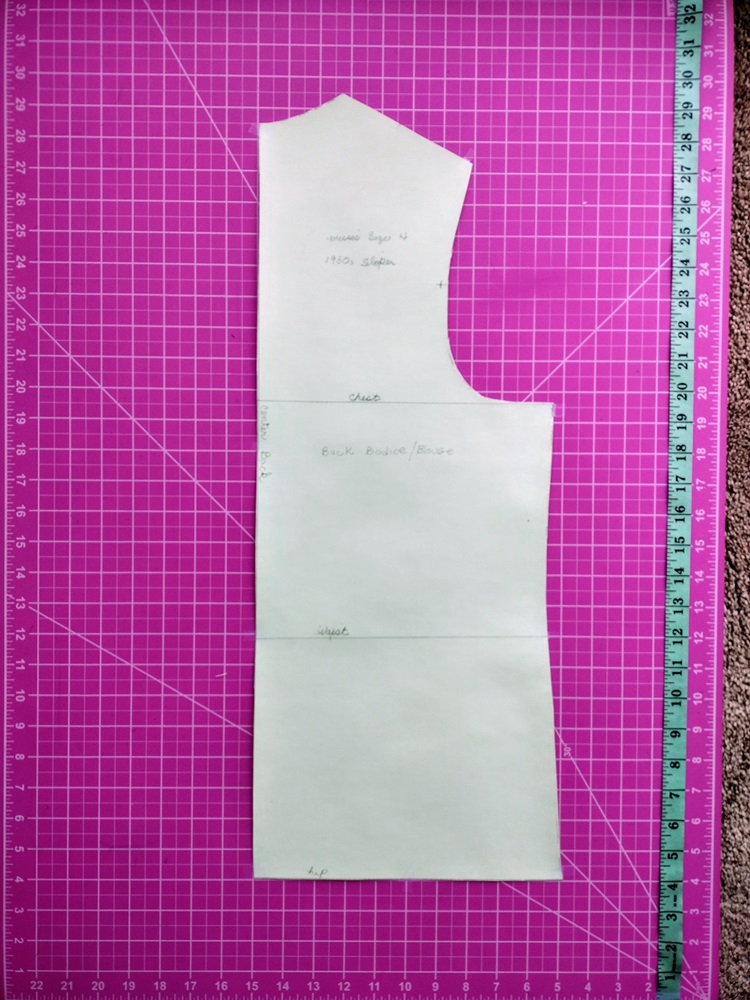
Bodice-Blouse Back

Fitted sleeve with vertical dart

The Sloper: Slim Skirt

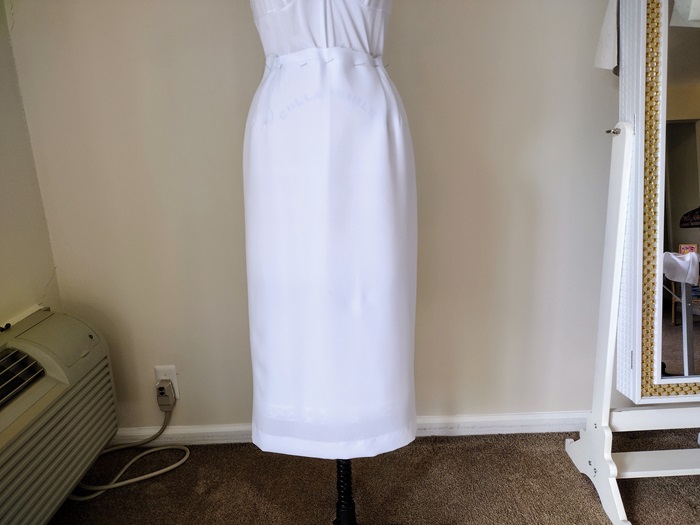
Slim skirt front

Slim skirt front

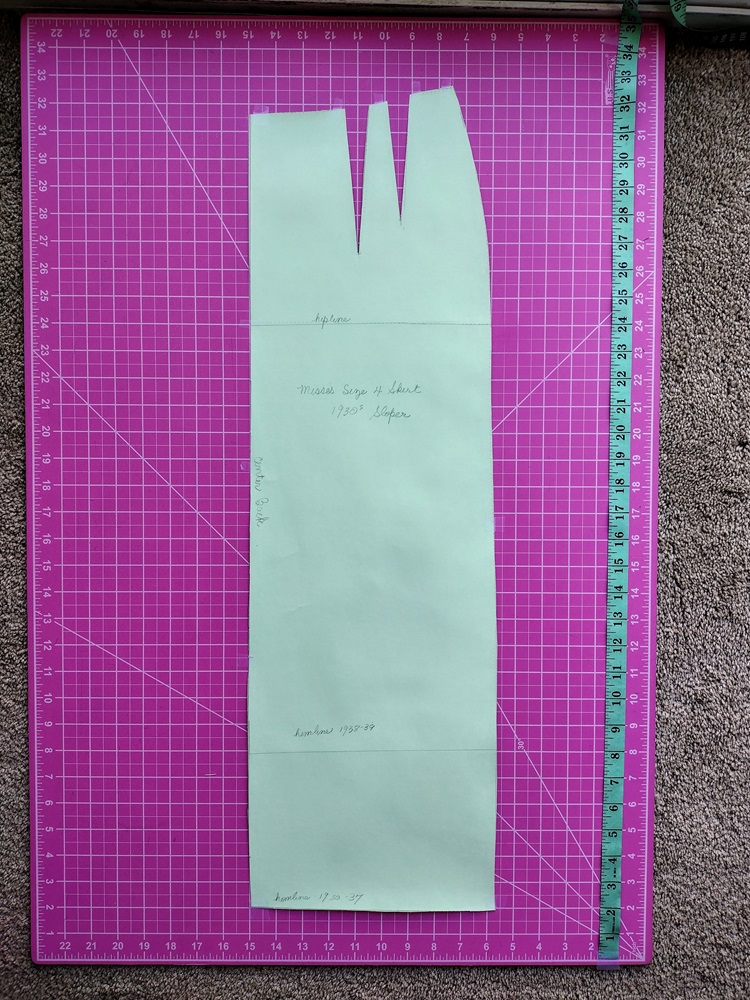
Slim skirt back

The Sloper: Flared Skirt, longer length

Long flared skirt front

Long flared skirt back

Long flared skirt front

The Sloper: Flared Skirt, shorter length

Short flared skirt front

Short flared skirt back

Short flared skirt front

How to draft a Sheath Skirt Sloper

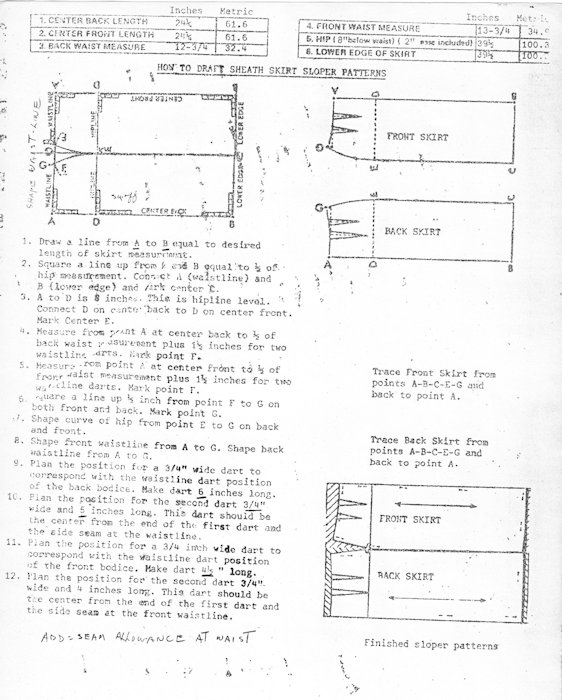
These pattern drafting instructions were given to me by a student who attended the Traphagen School of Design in the 1980s. It was a private design school in New York City. The instructions are very simple when you take the time to read them through before you start drafting your pattern. Make a muslin to test the fit before using this as the basis pattern for any pencil skirts or other designs based on the basic skirt sloper. The basic sheath skirt (a/k/a pencil skirt, slim skirt, wiggle skirt) has not changed. This pattern can serve as a sloper for vintage or modern skirt designs.

Measurements Needed

Center Back Length (from center back waist to desired length of skirt)
Center Front Length (from center front waist to desired length of skirt)
Back waist measure (from side to side seam at back)
Front Waist Measure (from side to side seam at front)
Hip Measurement – 7 to 9 inches below waist-use widest circumference.  Add 2″ of ease to measurement.
Lower Edge of Skirt (this measurement is determined by the hip circumference plus 2″ ease

Important Note:  Look at the complete diagram.  The rectangle runs from point A back to point A front at waistline.  Point B back runs to point B front.  Point A to B in the back and Point A to B in the front is the skirt length.  I found it easier to start with a large rectangle where A-A and B-B equals the complete hip measurement plus 2 inches of ease.  So draw A-A for the waist.  The draw A to B for center back.  Draw B to B for lower edge.  Then from B in lower edge of front draw a straight line up to A front.

Then proceed to step 2.

1.   Draw a line from A to B equal to desired length of skirt measurement.

2.   Square a line up from A and B equal to 1/2 ofequal to 1/2 of B (lower edge) and mark center C.

3.   A to D is 7 to 9 inches below waistline.  This is the hipline level.  Connect D on center back to D on center front.  Mark Center E. 

4.   Measure from point A at center back to 1/2 of back wait measurement plus 1 1/2 inches for two waistline darts.  Mark point F.

5.   Measure from point A at center front to 1/2 of front waist measurement plus 1 1/2 inches for two waistline darts.  Mark point F.

6..   Square a line up 1/2 inch from point F to G on both front and back.  Mark point G. 

7.   Shape curve of hip from point E to G on back and front.

8.   Shape front waistline from A to G.  Shape back waistline from A to G.

9.   Plan the position for a 3/4″ wide dart to correspond with the waistline dart position of the back bodice*.  Make dart 6 inches long.

10.   Plan the position for the second dart 3/4″ wide and 5 inches long.  This dart should be the center from the end of the first dart and the side seam at the waistline.

11.   Plan the position for a 3/4 inch wide dart to correspnd with the waistline dart position of the front bodice*.  Make dart 4 1/2″ long.

12.  Plan the position for the second dart 3/4 wide and 4 inches lont.  This dart should be the center from the end of the first dart and the side seam at the front waistline.

13.   Cut out sloper.  This sloper must have 1/2″ seam allowances added at waistline, side seams and center back.  Add hem allowance at bottom of skirt.  The hem for the basic skirt is usually 2″

Misses Size 8 Slopers you may copy and use

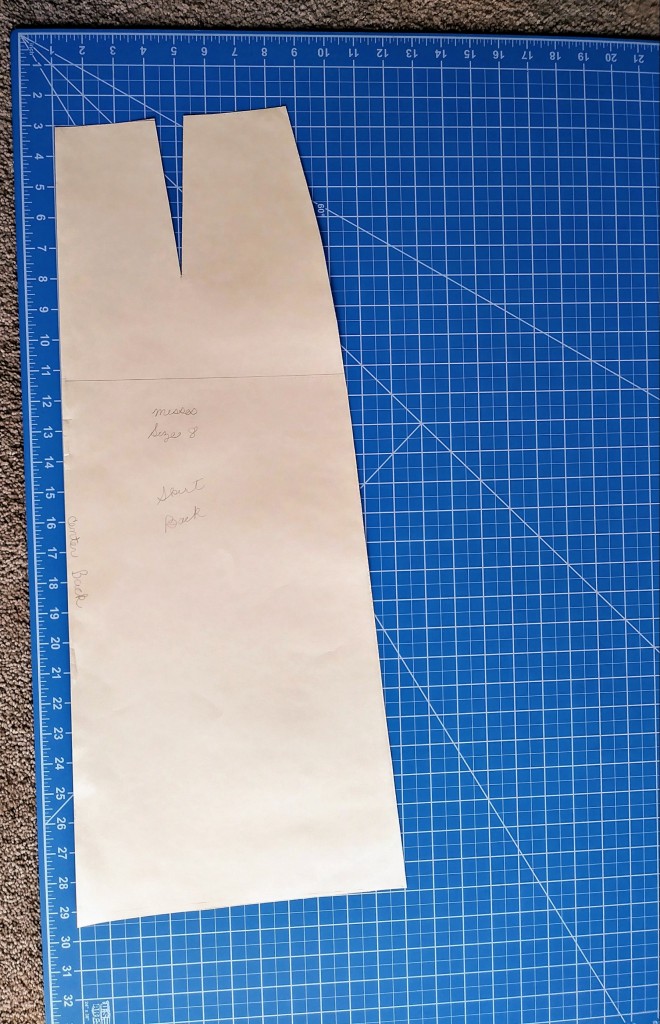
I am releasing my Misses size 8 slopers into the commons. I grant permission to anyone who wants to use them commercially or personally. You can copy, download and size in your graphics program. My reason for making these available is to help others get a head start on their patternmaking and dressmaking business or hobby. The slopers were developed through draping on a Misses size 8 Wolf form. The grid used for the photos is in inches.

Note: The Precision Draping Method developed by Nellie Weymouth Link in 1947 is the system used. There are a few differences in the skirt from the skirt draped in a modern system. The Pencil Skirt which is used today was developed in the 1950s. It is tubular in shape and not given to much flow or movement unless slits or kickpleats are added. The skirt developed with Precision Draping is similar to the skirts you see in the 1940s: slightly A-lined, fitting smoothly over the hip and then flowing past. The result is a slight flare and movement when walking. It is more comfortable and figure flattering, too.

Basic Fitted Bodice Front and Back

Basic Fitted Bodice Front Misses Size 8
Fitted Bodice Back Missies Size 8

Basic Unfitted Sleeve

Basic Unfitted Sleeve Misses Size 8

Basic Skirt Front and Back

Basic Skirt Front Misses Size 8
Basic Skirt Back Misses Size 8