Draped Princess Bodice and Flared Skirt Jumper 1950s Style

Introduction

I always wanted a princess seamed dress or overblouse. Now that I have fulfilled the realization of my idea I have to say that it did not fulfill all my expectations. It did turn into a good learning experience about fit, style lines and individual body shapes.

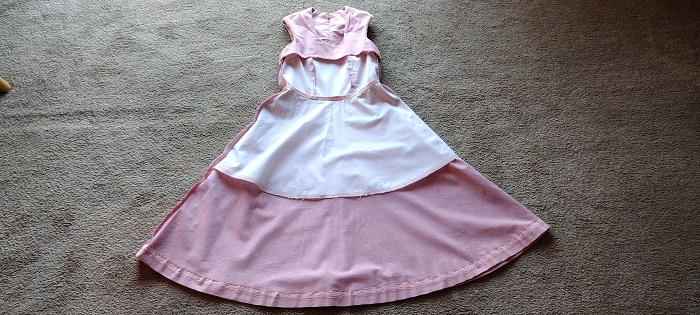
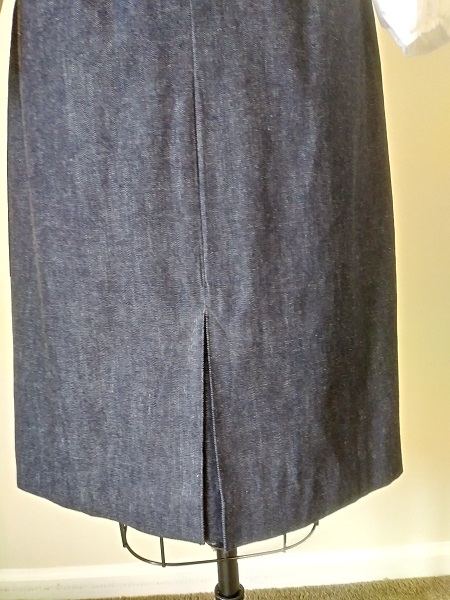
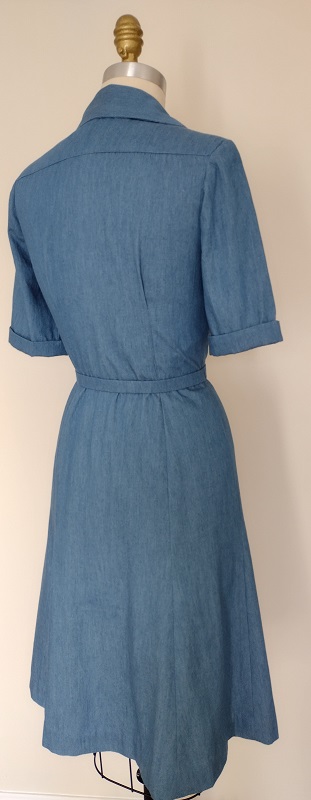
Photos of the Jumper

Background of the pattern

The pattern was based on the Misses Size 8 sloper developed using the Precision Draping technique created by Nellie Weymouth Link. The technique is detailed in a reprint of the 1947 book through Amazon and other booksellers online.

I altered the pattern after fitting the toile on myself and making adjustments.

Expectations vs. Reality

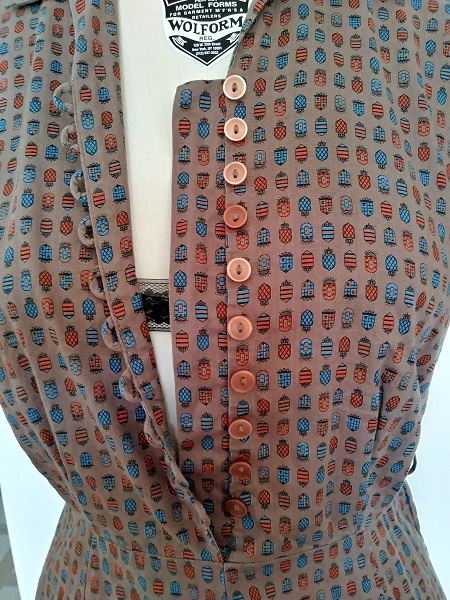
Originally I envisioned the princess seam over my bustline to be very flattering. Once it was finished I did not care for the look on myself.

I have sloping shoulders. This causes the apex of my bustline to be lower than a standard size. The result is that the princess seam curves a bit lower, emphasizing both my bustline and narrow, sloping shoulders. I straightened the curve on the pattern, but that did not make much difference.

I offer this experience as a way for others to learn what makes the most flattering fit for their own body type.

I love the flared skirt of the jumper, the neckline and the armholes. If I were to make this again I would use a vertical dart below the bust or perhaps two French darts in the side seam of the bodice front.

Sewing Techniques

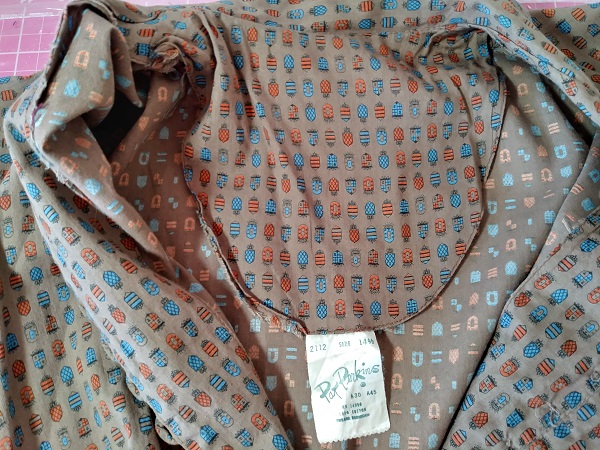
The jumper is made from 100% cotton chambray I ordered from Mood Fabrics. The underlining is cotton batiste.

I underlined the bodice. The skirt was underlined from waist to a few inches below the waistline. I wanted the fabric to have less transparency. The underlining also served as an anchor to the zipper.

Hidden Zipper: A 1960s Couture Technique

I used the instructions for the hidden zipper sewing technique detailed in Couture Sewing by Claire Shaeffer.

The zipper must be sewn to garment pieces that are underlined. This is because the finished seam is anchored to the underlining with catch stitches or fell stitches.

The resulting zipper is a little like an invisible zipper but less rigid.

Seam Finishes

I cut the seams wider than usual because the fabric frayed. Edges were pinked and zig-zagged for durability.

Other Finishes

The all-in-one facing and hemline were finished with Wright’s Flexi-Lace. I used the Flexi-Lace for the waistline stay, too.

How to refine a Denim Sheath Skirt look

Introduction

In this posting I share some of the fitting and sewing techniques I used to refine my favorite denim sheath skirt. The skirt is made with a bottom weight 100% cotton denim by Kauffman. The fabric was laundered and dried prior to marking, cutting and sewing.

The pattern was developed entirely through draping in cotton muslin.

The skirt had several parts of the construction done by hand. The blouse was purchased online.

Fit is Everything!

To give the skirt more style ease I had to add extra width at waist, hip and hemline. Some sewing books say extra width can be added at the side seam. I found that it is better to open the pattern between the second dart and the side seam. You measure the mid-way point between the dart and the side seam. Draw a vertical line from waist to hem. Then open 1/4 of the total amount of style ease needed. This alteration is the same for front and back of the basic sheath skirt pattern.

In the photo of the back pattern piece for the skirt you can see the place where the cut was made and extra paper added to the pattern between the second dart and the side seam.

Note: The pattern for the skirt was made using Precision Draping by Nellie Weymouth Link. I gained weight since the time the original drape and pattern was made. This necessitated the need for the alteration.

Dressmaker Finishes for a Refined Look

A slot zipper application was used. I followed the hand sewing technique detailed in Couture Sewing by Claire Schaeffer. Instead of using a prick stitch or back stitch, the zipper is sewed into the seam using tiny running stitches. To further secure the zipper in place, the zipper tape is fell stitched only to the side seams, at the edges. The zipper stop is covered by a lightweight piece of lining fabric. I used a small piece of lace hem tape instead.

A kick pleat with insert was made in.center back seam. It provides ease of movement as well as a finishing touch. The top of the kick pleat is stitched into place using a triangular shape. A kick pleat is more refined than a high slit at center back of the skirt. That is why this skirt works well for casual dress days at work or an outside meeting with business associates.

All seams were pinked and then edge stitched. Wrights Flexi-Lace tape provided a finish for the hem and kickpleat.

Photos of me wearing the Pat Perkins 1950s dress and my 2021 version

Please note: I forgot to button the second button on the Alice Elizabeth dress when putting it on for the photo. Also my version of the dress was created for a Misses Size 8. I did not alter the pattern or the dress because this is part of my portfolio, not my personal wardrobe.

The Pat Perkins dress is a little short in the waist for me. otherwise the fit is very good. There is a 2″ style ease at the waistlisne which makes putting on the dress very easy. I wore the dress all morning and found the side zipper did not bother me at all. Going forward, I will use a lapped zipper in he side seam for my next 1950s style dress. I think I made too much work for myself going with snaps from waist to knee.

The side seam zipper lies flat. It does not affect the hip line or bodice side seam. I think this is because the fabric is a lightweight cotton. This was an amazing purchase, The dress is in such good condition. I feel so fortunate to have it both to wear and use as a study piece for learning more about vintage garment construction.

Alice Elizabeth: My version of a 1950s House Dress by Pat Perkins

Introduction

The dress pattern and design is based on a 1950s house dress by Pat Perkins that I bought during Lockdown 2020. I wanted to create a basic pattern to dervice this and future retro inspired clothes I make. I bought the dress from a vintage seller on Etsy and posted a detailed style analysis . I had plenty of time during lockdown to learn about different vintage draping and patternmaking systems. I chose to teach myself Precision Draping from the book of the same title by Nellie Weymouth Link.

After draping the basic toile on a 2019 Misses Size 8 Wolf Form, I created a sloper on oaktag. I released this sloper into the public domain for anyone to use and improve on. This sloper is the basis of the pattern for the Alice Elizabeth dress.

Dress and Pattern Details

The dress consists of a fitted bodice with two vertical dart tucks on each side of the bodice in front. The skirt is six gores with a very moderate flare at the bottom. The Pat Perkins dress has buttons and loop closure down center front. A metal zipper was sewn into the left seam from 2″ under the arm until the hip line using a lapped application.

I do not like side seam zippers for two reasons. First they can be uncomfortable. Second they interfere with the flow of the underarm seam and skirt side seam. Since fitted clothing often falls on the bias at the side seams the potential for distortion exists. I hand sewed six button holes in the front of the bodice.

My reasons for avoiding buttonholes on the entire dress is that it would spoil the look of simplicity and efficiency the house dress is supposed to convey. I had not thought about using a hidden zipper when the dress was in progress. Now that it is finished I have a hidden zipper in mind for the future. It is a simple application I will detail when it is in progress. I used snaps because the front portion of the skirt looks better. The eye is drawn upwards to focus on the striped buttons and self-fabric belt. I do not care for metal eyelets and prongs in a belt so I used snaps to fasten the belt.

The edge of the front facing, the waistline stay and hem were finished with navy blue Flexi-Lace by Wrights. Seams were pinked. I chose these finishes because they are similar to home based seamstresses used in the 1950s. The Flexi-Lace tape was completely stitched by hand to the waistline seam using a running stitch at the waist and edge for flexibility. I used a cross-hatch stitch to join the stay to side seams and dart tucks.

The dress is made from 100% cotton chambray. It is very soft with a good drape. To support the dart tucks more a small edge stitching was used.

A back yoke was used to eliminate the neckline dart on the basic back bodice pattern. That too was edge stitch. On the inside, the yoke is interfaced and lined. The dart tucks in the back are also top stitched.

The collar is a basic collar pattern with a high stand. The undercollar and interfacing are cut on the bias. The sleeves have all-in-one cuffs.

Accessories

I chose understated accessories in sterling silver to keep to the everyday quality I want this outfit to have. The earrings have a pretty filigree. A small silver necklace, about 16″ long, with tiny beads would also look good with this dress.

Ballerina flats in navy blue complete the outfit. They pick up on the color of the stripes on the buttons. The overall impression of this outfit is meant to make the wearer attractive in a modest, understated fashion just as house dresses were intended in the 1950s.

Pat Perkins Everyday Dress, circa 1950s – Analysis

Introduction

Further consideration of my plans for my next project is needed. The sketch of the chambray shirtwaist dress expresses my idea. However, the details I had envisioned must be changed.

I had planned on having in-seam buttonholes. I have been wanting to try this kind of buttonhole for a long time. I want to see how it will work on light to medium weight fabrics. As I thought about my shirtwaist dress I can see that having a seam along center front will cut into the middle gore of the skirt front. This will add extra weight and interfere with the flare. I plan a six gore skirt for the dress.

Possible solutions for new design details

I decided to analyze the construction details of a Pat Perkins everyday dress I bought on Etsy. Pat Perkins was the name of a dress manufacturer in the 1950s. They provided some of the dresses worn by actress Audrey Meadows in a popular sitcom, “The Honeymooners”.

I found the solution to keeping the flares of the skirt undisturbed. I will have to install a lapped zipper into the side seam. I will use the same treatment as used in the Pat Perkins dress. This means I can use in-seam buttonholes for the dress. However, the buttons will only be used on the bodice. Having a size zipper will provide the means for ease in putting the dress on or off.

Pat Perkins Everyday Dress circa 1950s

The dress has a fitted bodice with two vertical tucks on each side at the front. The short, unfitted sleeves have a self cuff that turns up from the inside. The collar is similar to a blouse collar and has very little stand. The back bodice has two very small tucks on each side.

The skirt i seven gores: 4 in front and 3 in back. There is a slight flare in each panel. The panel at center front has a seam. At the back there is no seam in the center skirt panel.

To make the dress easy to put on and off, there is about 3″ of style ease at the waist. The fit near the chest and bust has a little less style ease. This will help me adjust my pattern after using the sloper to trace the basic pattern.

The zipper is machine stitched into the left side seam. There is an underlap of fabric that provides body for the zipper and protects the wearer from feeling the zipper teeth. I plan to do the zipper application by hand and use a lightweight nylon zipper. The one in the original dress is metal.

The dress closes with self fabric button loops at center front. An underlap on the left side of the front bodice provides support.

The belt holes are not reinforced with any stitching. No eyelets were used. The buckle is covered with the fashion fabric. Narrow loops at the side seams are the only support to hold the belt in place. The backing has the stamp “Belt King”. I plan to use a belt kit and eyelets. At the side seams I usually use thread loops.

To lend a touch of support to the back of the dress a long facing is used as part of the collar treatment. I do not plan to use this neckline finishing since my dress will have a yoke.

The seams are not finished. No pinking, no edge stitching. The waistline seam is pressed down rather than up. The hem was turned twice and looks to be hand finished.