
Introduction
Further consideration of my plans for my next project is needed. The sketch of the chambray shirtwaist dress expresses my idea. However, the details I had envisioned must be changed.
I had planned on having in-seam buttonholes. I have been wanting to try this kind of buttonhole for a long time. I want to see how it will work on light to medium weight fabrics. As I thought about my shirtwaist dress I can see that having a seam along center front will cut into the middle gore of the skirt front. This will add extra weight and interfere with the flare. I plan a six gore skirt for the dress.
Possible solutions for new design details
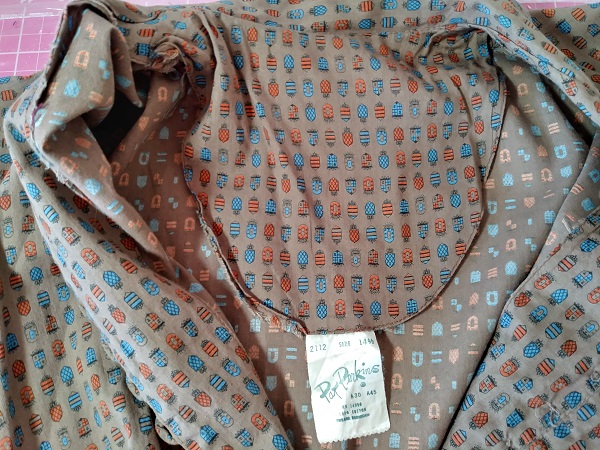
I decided to analyze the construction details of a Pat Perkins everyday dress I bought on Etsy. Pat Perkins was the name of a dress manufacturer in the 1950s. They provided some of the dresses worn by actress Audrey Meadows in a popular sitcom, “The Honeymooners”.
I found the solution to keeping the flares of the skirt undisturbed. I will have to install a lapped zipper into the side seam. I will use the same treatment as used in the Pat Perkins dress. This means I can use in-seam buttonholes for the dress. However, the buttons will only be used on the bodice. Having a size zipper will provide the means for ease in putting the dress on or off.
Pat Perkins Everyday Dress circa 1950s


The dress has a fitted bodice with two vertical tucks on each side at the front. The short, unfitted sleeves have a self cuff that turns up from the inside. The collar is similar to a blouse collar and has very little stand. The back bodice has two very small tucks on each side.
The skirt i seven gores: 4 in front and 3 in back. There is a slight flare in each panel. The panel at center front has a seam. At the back there is no seam in the center skirt panel.


To make the dress easy to put on and off, there is about 3″ of style ease at the waist. The fit near the chest and bust has a little less style ease. This will help me adjust my pattern after using the sloper to trace the basic pattern.
The zipper is machine stitched into the left side seam. There is an underlap of fabric that provides body for the zipper and protects the wearer from feeling the zipper teeth. I plan to do the zipper application by hand and use a lightweight nylon zipper. The one in the original dress is metal.

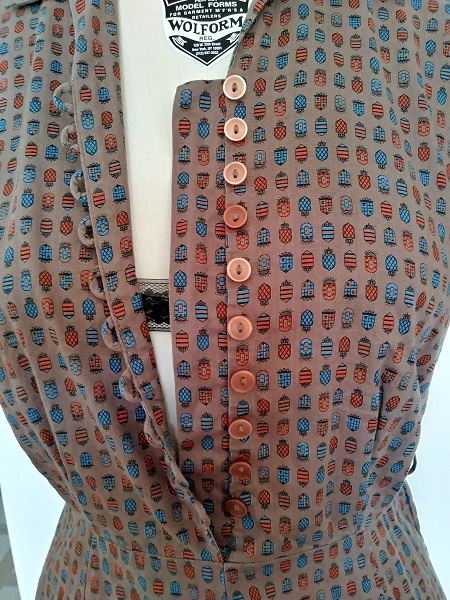
The dress closes with self fabric button loops at center front. An underlap on the left side of the front bodice provides support.

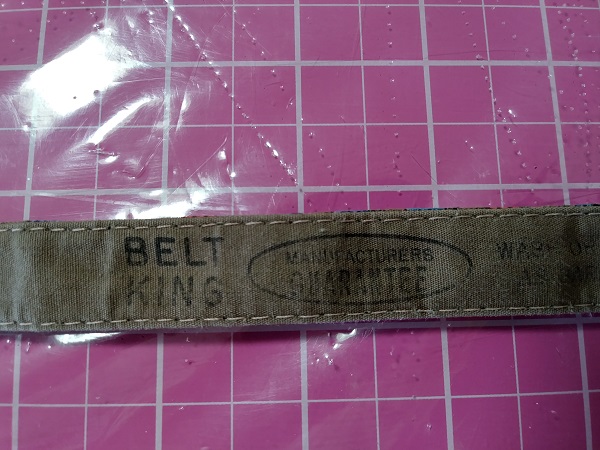
The belt holes are not reinforced with any stitching. No eyelets were used. The buckle is covered with the fashion fabric. Narrow loops at the side seams are the only support to hold the belt in place. The backing has the stamp “Belt King”. I plan to use a belt kit and eyelets. At the side seams I usually use thread loops.


To lend a touch of support to the back of the dress a long facing is used as part of the collar treatment. I do not plan to use this neckline finishing since my dress will have a yoke.
The seams are not finished. No pinking, no edge stitching. The waistline seam is pressed down rather than up. The hem was turned twice and looks to be hand finished.

2 thoughts on “Pat Perkins Everyday Dress, circa 1950s – Analysis”
Comments are closed.