Introduction


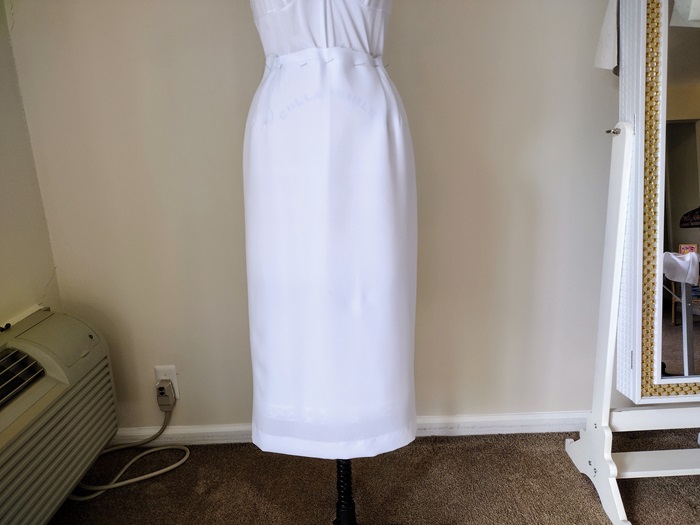
The fitting toile for my 1930s Inspired Skirt and Blouse is finished. I am now thinking of a name for this outfit. I have to research popular women’s names during the 1930s. When I find the one that resonates with this outfit that will be the name I choose. This usually happens after I have completed selecting accessories and lingerie to complete the look.
Please note that the sloper and the pattern are not copies of 1930s patterns or created using a 1930s patternmaking system. I used a modern patternmaking system to save time and because the resulting fit meets the needs of the modern woman for comfort to move and ease in putting on and off.
Details of the Fitting Toile for the 1930s Inspired Skirt and Blouse


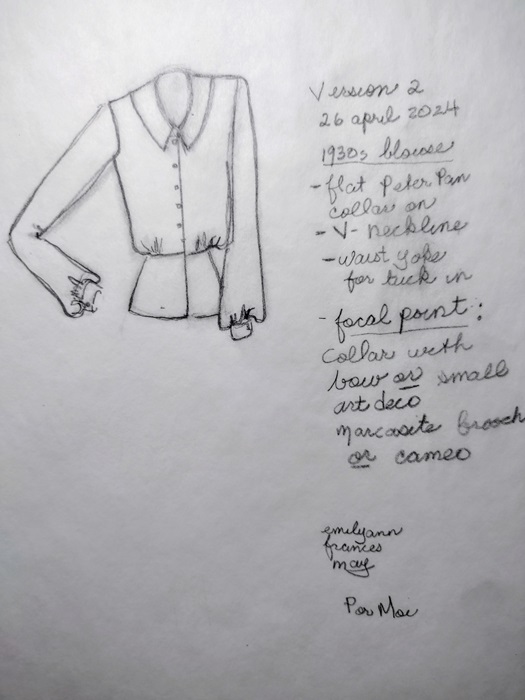
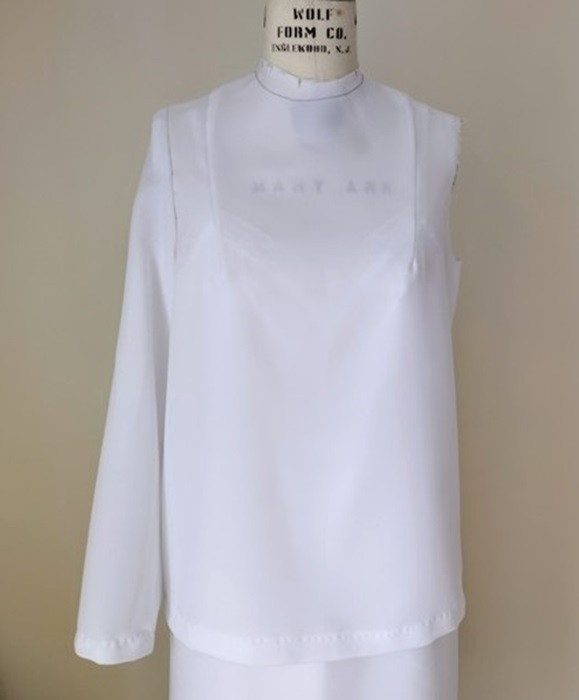
One of the difficult details for me in recreating a 1930s inspired blouse was training my eye and mind to accept a wide, flat fitted collar. On the right hand side of the collar in the photo is the narrow collar I started with. I thought this would look better. As I thought about it I realized that I am thinking too much of the narrow Peter Pan collars of 1950s dresses and blouses. I have experience with those, but not with the bolder, wider styled collars of the 1930s.
To attune my eye so that I created the right width I drafted a wider collar and made a toile from that collar pattern. I then pinned it over the left side shown in the photo. I gave myself time to visually accept the comparisons before making a decision. In time I realized the wider collars felt right and looked better for this style of blouse. So with that the wider flat fitted collar was chosen.
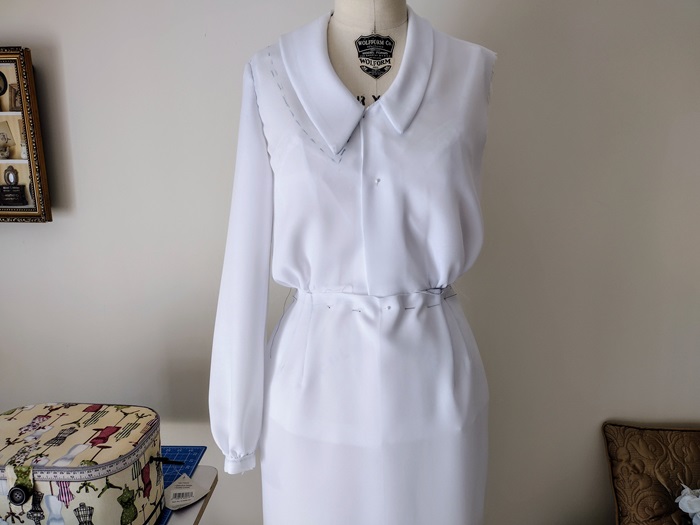

Note: Collar on left is wider than collar on the right. The comparison was made to determine the best width for the overall look of the blouse.
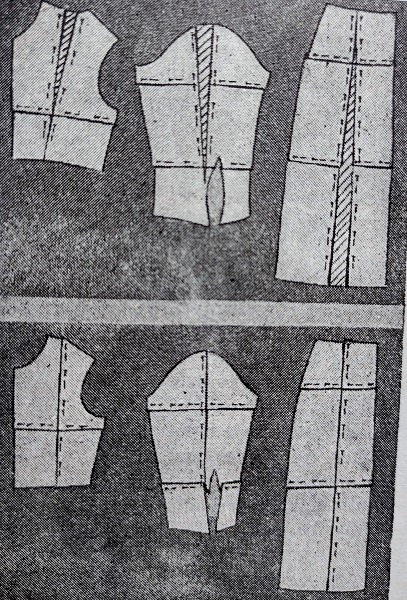
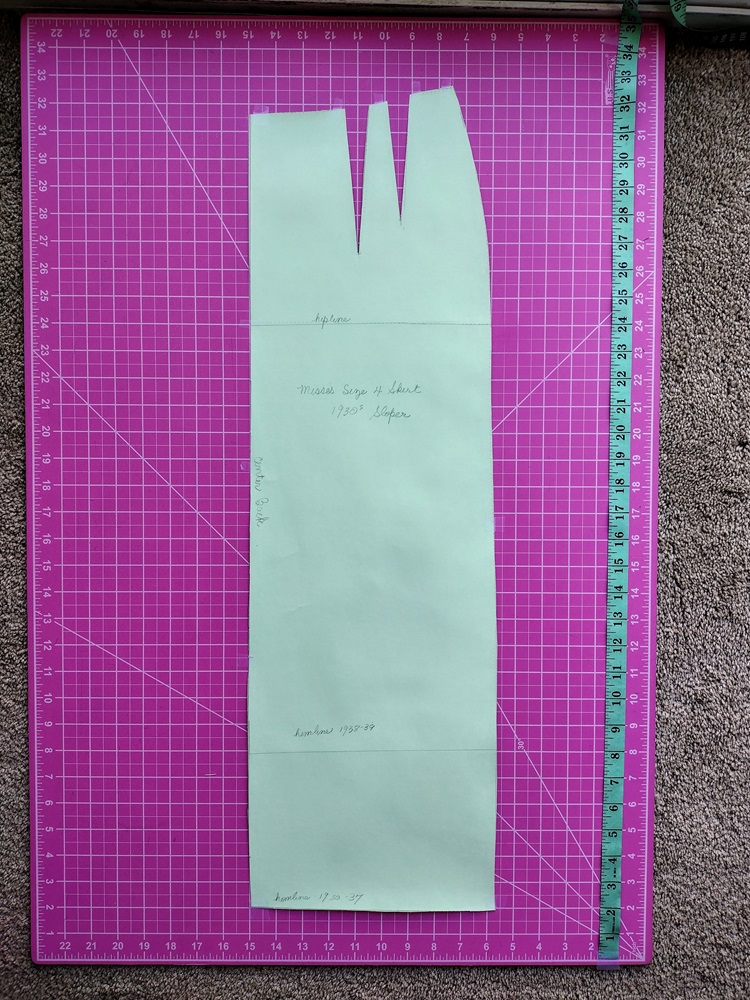
Have you ever noticed how many vintage pattern illustrations from the 1930s and 1940s show blouses with smooth lower portions that look like peplums? Not every blouse with this lower portion that looked like a peplum was indeed a peplum. It was actually a blouse yoke, a feature that is still used in French couture today. The blouse yoke is made from a basic pencil skirt pattern with length equal to distance from waist line to hip line. One or both darts are open to create a very slight flare. The yoke is adjusted during fitting to come a little closer to the hip curve.
The upper portion of the blouse runs from the neckline to waistline. The waist is sewn to the yoke after the bodice side seams are finished. When the skirt is put on, the yoke holds the blouse in place. It also provides a nice fullness and smoothness for the skirt to flow over the hips.
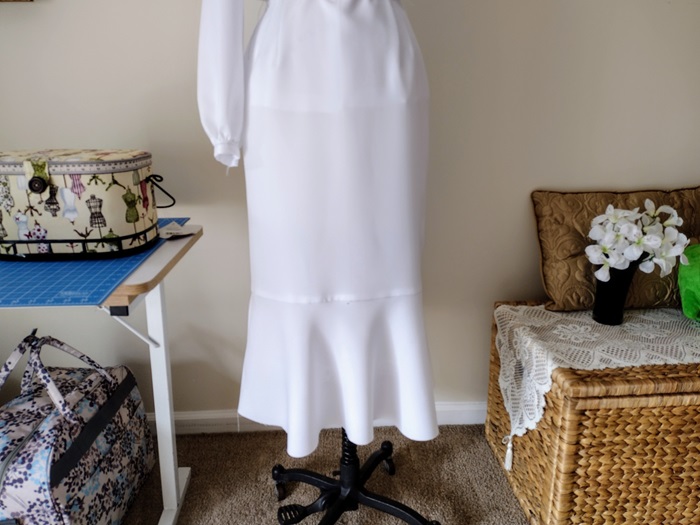
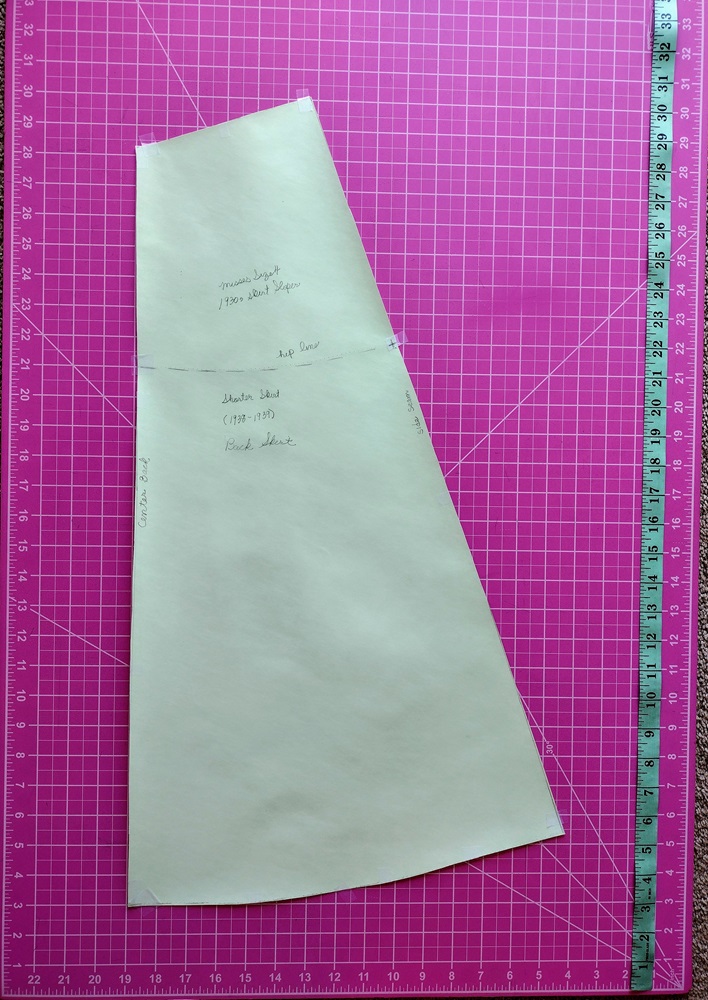
The flounce pattern is derived from cutting a length off the upper skirt pattern. Front and back are evenly divided and opened an equal amount for the slashes. Here is an important tip I learned from trial and error: measure the width of the hem at front and back. They should be equal. Otherwise the flares will look uneven. To get the best and softest flow and movement, cut the flounce at center front placed on the fold of the true bias. This takes more fabric but the result is very beautiful. The flounce can also be cut with center front on the lengthwise grain. There will still be flare but not as much as when cut on true bias.
The skirt will have a 1/2″ to 3/4″ waistband backed with Ban-Rol. This gives a smooth look and fit. The result is that the waistband has an effect similar to a belt. The skirt fits better and the waistband never rolls or bends as it would without interfacing or a non-woven interfacing that is washed or dry cleaned many times.


You must be logged in to post a comment.