You don’t need a closet full of coordinated outfits to look chic in summer. With just a few basic skirts and tops, you can create stylish, breathable looks that feel effortless. The key is simplicity—soft colors and gentle prints help you project calm and ease, even in heat and humidity.
This is the first post in my Style Sense series. Each look is built from two slim skirts and a mix of solid and printed tops. None of the pieces were bought as a set—they were collected over time. When you stay true to your style and color preferences, your wardrobe naturally works together. You can always shop your closet to create something fresh.
Summer Chic: Vanilla Crème
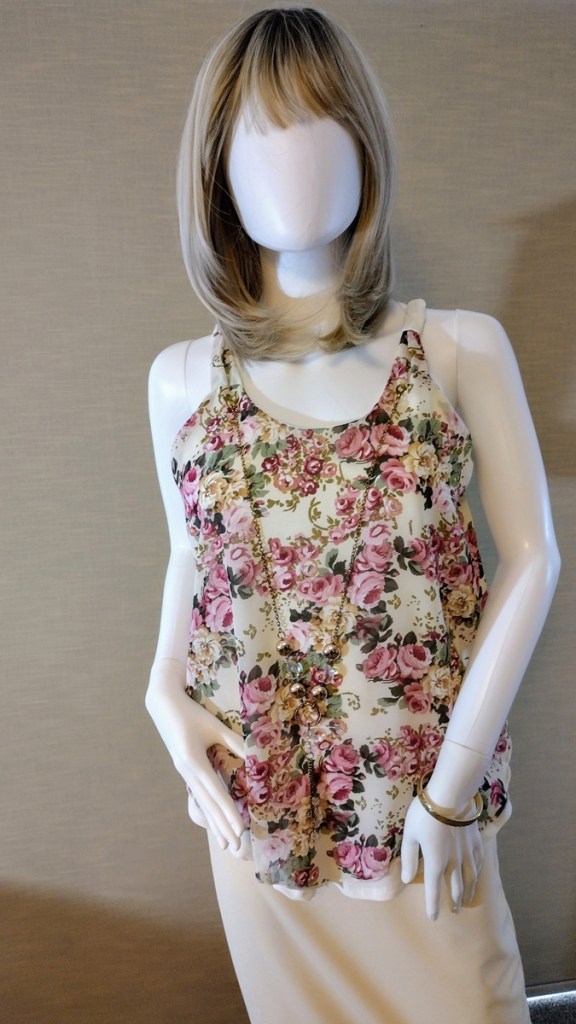
A vanilla-colored pencil skirt is a summer essential. It pairs beautifully with halter tops, tanks, and breezy overblouses. Its soft neutrality complements both prints and solids, making it a versatile base for countless outfits.
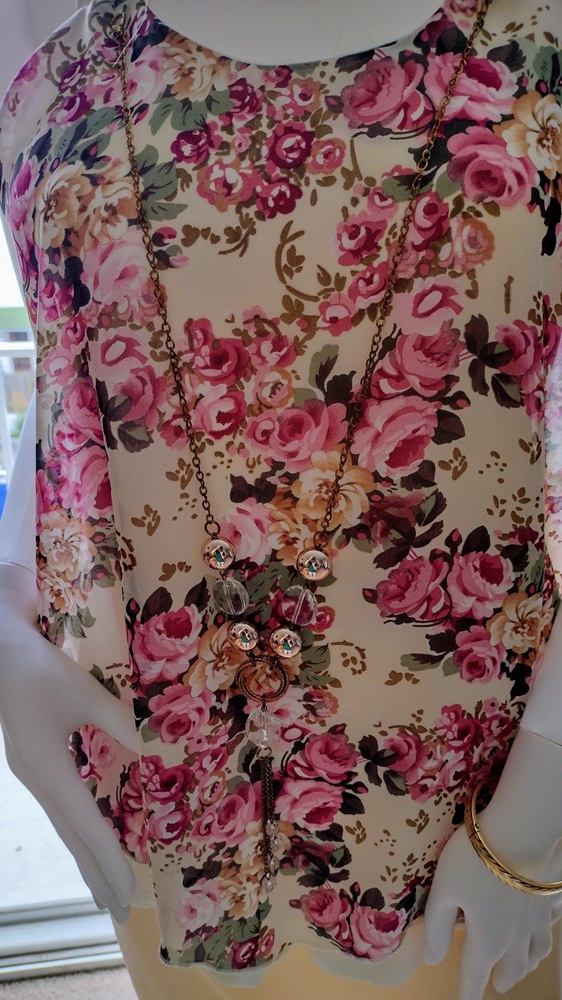
In this look, the top is the focal point. To keep the eye drawn upward, I added a simple gold bangle and chose beige sandals that contrast subtly with the skirt. The soft floral tones—roses and leaves—add a feminine touch without overwhelming the palette.
Necklaces can feel heavy or sticky in humid weather. This top features a clever solution: the necklace is detachable and secured with clear plastic loops sewn beneath each shoulder. Each side of the necklace has a clasp that hooks into the loops. It’s a thoughtful detail that can be adapted to your own summer sewing projects.
Style Notes
– Choose a mid-calf or ballerina-length pencil skirt in a neutral shade like vanilla – Look for a stretch skirt with no zippers or wide waistbands—comfort matters in the heat – If the skirt is sheer, wear a lightweight slip in white or off-white – Select a top in a color or print that complements the skirt – Sandals should be close to the skirt’s shade, or slightly lighter/darker – Let the top be the focal point – Keep jewelry minimal—bangles or earrings work well without adding bulk
For this styling exercise I wanted to apply the principles of Minumalism. Here are a few key elements of Minamulism in design and styling:
* Clothing is well fitting. * Neutral shades predominate. * Classic styling with minimal details. * High quality fabrics and notions. * Form follows function. There must be a purpose to every part of the garment. This results in fewer frills and non-essential details. * Accessories must be carefully chosen and contribute to a refined look.
I started with my favorite Little Black Dress (LBD).
LBD Details
I bought this LBD at a small boutique on Fifth Avenue in Bay Ridge, Brooklyn. A sewista with mid-level skills will be able to analyze the style lines and understand how the fit is achieved. This LBD skims the body but is not form fitting. Fit is achieved through vertical princess seaming from shoulder to hem on each side of center front and center back. The princess seams intersect with the bust dart and vertical dart on the front of the basic sheath dress pattern. They also go through where the shoulder dart and vertical dart on the back basic pattern are.
There are two layers to the butterfly sleeves. Each layer is lined with a lightweight black satin. The dress is also lined with the same material. This helps the dress fit smoothly over the body. My challenge was to find one accessory that adds visual interest and works as a definitive focal point for the outfit. Determing the focal point is a skill developed through practice. My ability in this area is still developing.
The Focal Point for the LBD
I decided there could be two different focal points. Which one I would apply depended on the occassion. Styling #1
The fluttery butterfly sleeves reminded me of similar sleeves on dresses and blouses of the 1930s. I wanted to add a combination of retro Art Deco and Modern Minimalism in the choice of the accessory to define the focal point.
I selected a wide elastic band belt with a triangular mock Marcasite belt. The sparkling belt buckle creates a striking contrast against the black dress. The width of the belt works well to create a more fitted look. The width of the belt is just right since it keeps the eye focused on the waist area. This is where I wanted the focal point to be.
Styling #2
For a different look, I removed the belt and considered accessories that create a different impact and vocal point. These accessories provide some interest but keep the eye focused on the fit and flow of the LBD. I chose costume jewelry in the form of a mock cubic zirconia ring set. The purse has a mock marcasite closure that also carries a little feeling of Art Deco. It may be used as a clutch. It also comes with silver chains with clasps that connect with loops that swivel up from the inside of the purse. For a little added sophistication, a silvery rhinestone perfume atomizer or lipstick case can add further interest to the purse as a focal point.
Conclusion
It is possible to combine the principles of timelessness and simplicity of Minimalism with one or two elements of vintage fashion. Practice and experimentation will help develop the sensibilities needed.
Have you ever wondered how you can sharpen your style sense and design vision? Developing your style sense is a path of continual improvement. How does a sewist or sewista practice color coordination and accessorizing? I asked myself these questions a few months ago. This is why I bought a mannequin. I named her Katie and she serves as a model and advisor. It is one thing to envision an outfit I will make or coordinate from clothing I purchased. It is another experience to see that outfit on a mannequin.
A mannequin can be another you, your muse or the customer you target for your creations. The mannequin enables you to step back and behold the impact of the outfit. In this sense, you can experience the outfit and the impression it makes. This experience takes place in real time, whenever you walk into the room and see the mannequin. It is more immediate and vivid that reviewing selfies, or photos others have taken of you in the outfit. The mannequin lets you experience the outfit in real time.
I am styling outfits for Katie from the clothing I already have. For this posting I created a casual back-to-the office look using separates. I did not buy any of the pieces at the same time. My preference for certain colors made the coordination of this outfit possible. Choosing a basic black mini-skirt and pumps also made the outfit come together. I would recommend a similar approach if you decide to start styling outfits on a mannequin. Choose one piece in black, white, navy blue, grey, or brown. Then pair it with a piece in a complementary color or print.
Sharing photos of your styled look will help you get feedback.. There is an excitement to discussing a new outfit and consulting with others what will round it out. In the process you will be interacting with others in a way that design team members do. Everyone will see the outfit in a different way. Some will suggest you add an element, and some may critique it. It is important to accept the feedback with grace and use it as a means to grow your style sense and design skills.
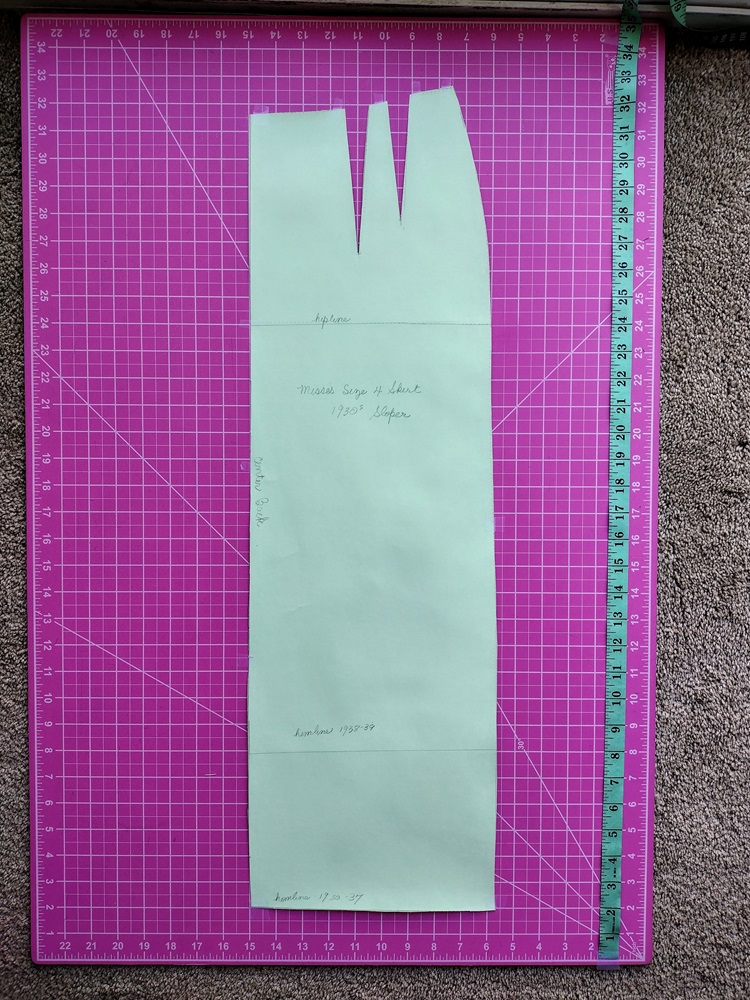
I am happy to share with you my hand drafted slopers that can be used to create styles with a 1930s feeling. The slopers are in a Standard Misses Size 4. The patterns were drafted with 3″ of style ease added to upper arm, chest, bust, and hips. The waist has 1 1/4″ ease added.
I did not use a period drafting system to save time. Instead I used the French Fashion Academy drafting technique which I learned in school. I think the results come close to capturing the pattern shapes in the 1930s drafting and sewing books I used for reference.
I release the slopers into the commons. The photos may be downloaded and used in a graphics program like Adobe to refine, grade, print and use as you please.
Research used: 1930s Pattern Cutting and Sewing Books
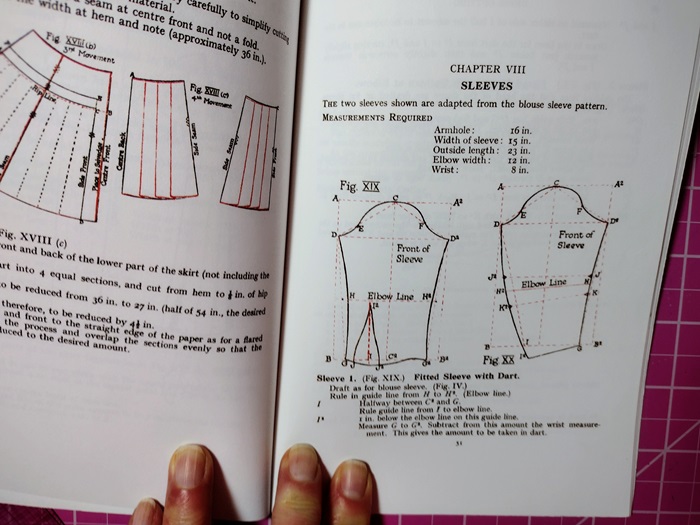
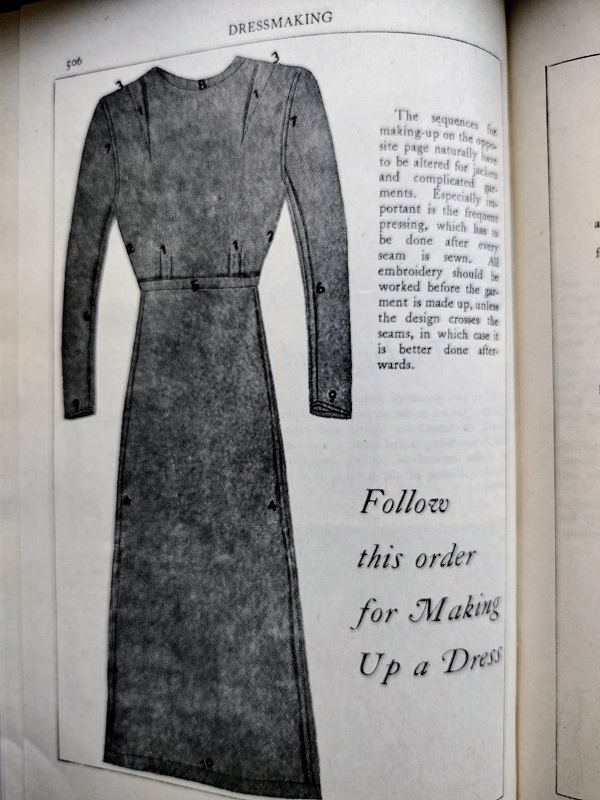
For the pattern shapes I used Dress Cutting by Margaret Ralston. Here are diagrams from the book for the bodice, sleeve and one of the basic skirts.
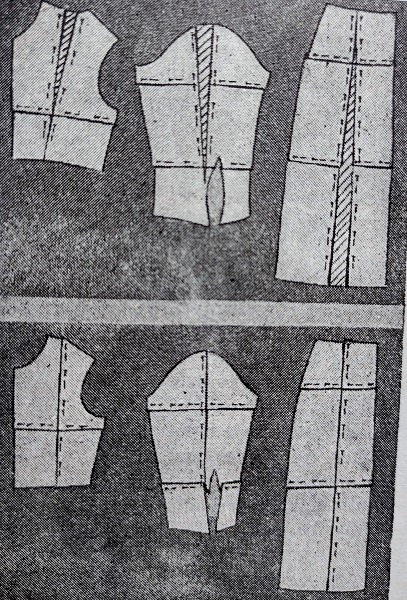
I referred to illustrations in Weldon’s Encyclopedia of Needlework as an additional step in learning about the shapes of basic patterns during the 1930s. Here are some illustrations from the chapter about fitting:
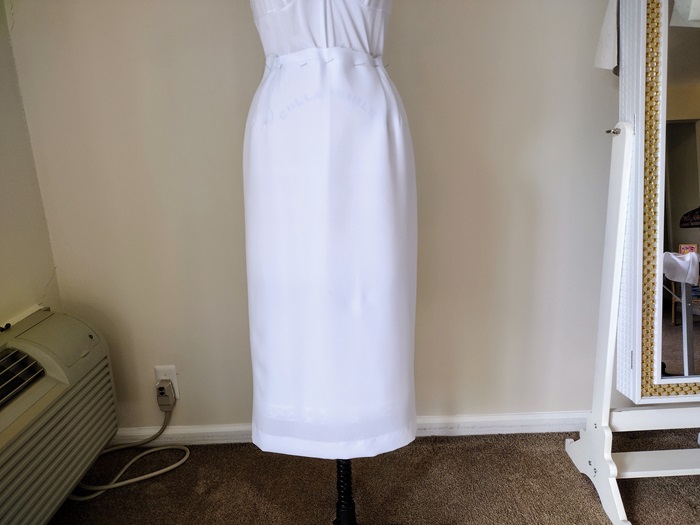
The results I obtained differ from the illustrations. The straight skirt is not as form fitting as a modern pencil skirt. The curve over the hip is softer and the skirt falls straight from the abodomen down. This is why I call it a “slim skirt”. I like the fit as it is not tight and it is not that form fitting in front or back.
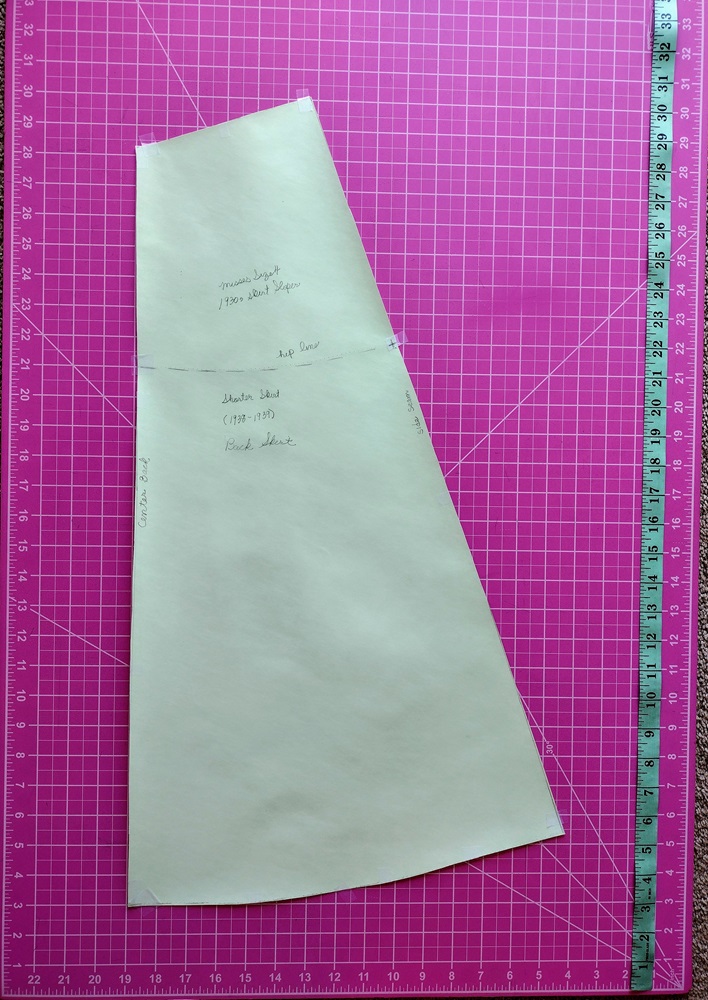
The slightly A-line and flared skirts do not fall as straight as the illustrations in Ralston’s book would have you think. I was surprised and pleased with the degree of flares each had. They are flattering and permit easy movement.
Hemline lengths differ during the 1930s
I bought scans of fashion illustrations from Etsy. These came from various sources and compiled by RetroKatDigital From the scans I saw that skirt lengths went to mid-calf length or lower from 1930 to about 1937. From 1938 to the end of 1939 hemlines went above mid-calf. The silhouette that became iconic during the 1940s was already evolving during 1938 and 1939. The shoulder line was more defined. The waistline was neatly nipped in and skirts had a more A-line shape that was less fluid, at least for everyday wear.
For this reason I marked two different hemlines on the slim skirt sloper. The shorter hemiline is for 1938-1939 inspired styles. The longer hemline is for styles influenced by fashions from 1930-1937.
I made a mid-calf flared skirt for 1930-1937 influenced styles. The sweep at the hemline is greater than that of the shorter flared skirt to be used for 1938-1939 influenced styles. The shorter skirt also has less flares.
The Bodice-Blouse Sloper and Fitted Vertical Dart Sleeve
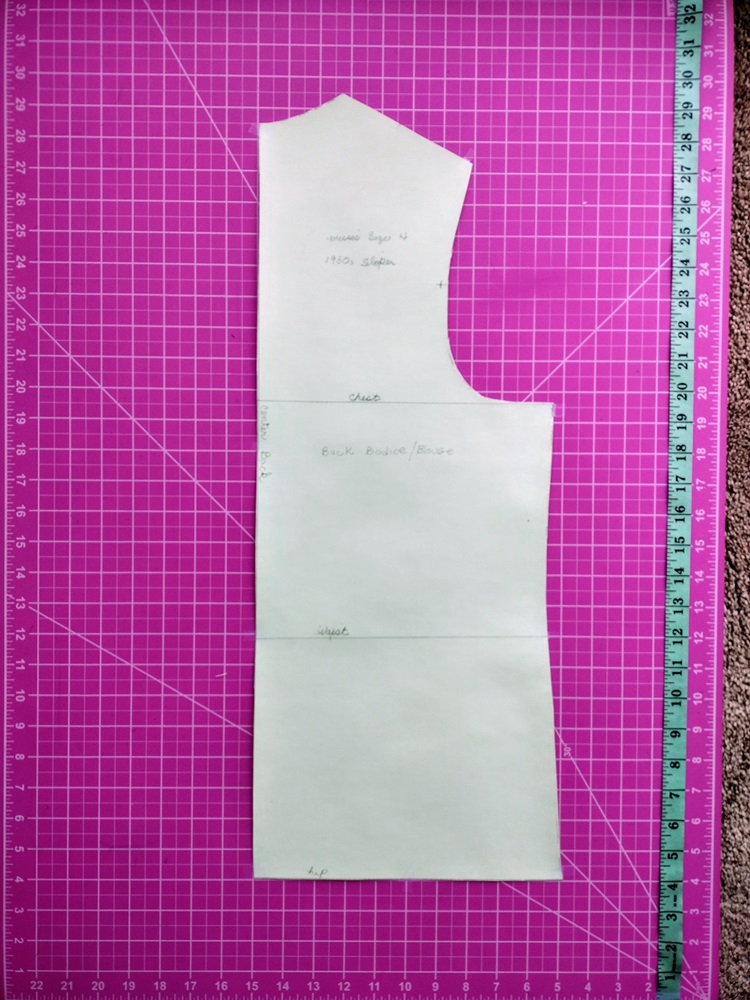
The sloper for the bodice-blouse ends at the hipline (8″ below the waist). The waistline is also marked. This way the sloper can be used for a blouse or the bodice of a dress. I chose an unfitted sloper because this shape agrees with what Ralston shows in her book. When used for a dress, the extra style ease can be gathered into the waist. Another approach is to make a toile, and then drape in tucks or small darts.
The vertical dart in the sleeve can be transformed into gathers that fit into a cuff. The effect is a very modified Bishop Sleeve. The sleeve can also be transformed into a sleeve with a point at the wrist. It can be cut above the elbow to make short sleeves, flared sleeves, bell sleeves and other kinds of sleeves.
Special Notes
–The measurements used for the sloper are the Basic Misses Size 4 plus 3″ ease to chest, bust, hips, and upper arm. The waist has 1 1/4″ ease.
–Always make a muslin to customize the fit or check that it is in line with the size 4 you use.
–Seam allowances of 1/2″ to 5/8″ must be added when cutting.
–The French Fashion pattern making system moves side seams of tops, bottoms and slaeves 1/2″ to the back of where the side seam is on the form or where it would be in mass manufactured clothing. This is done to create a better fit.
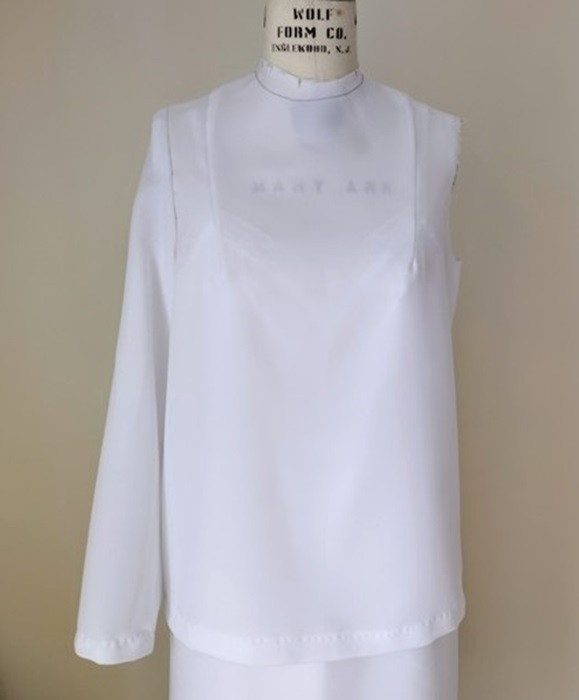
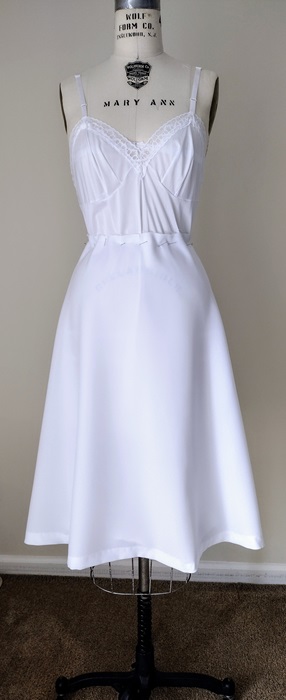
–The toiles are fitted over a one piece slip. This enables me to determine if the final fit has enough ease. It also improves the look of how the garment will drape over the form.
The Sloper: Unfitted Bodice with Fitted Sleeve (vertical dart)













You must be logged in to post a comment.