Dressmaker’s Library: Young Originals (Emily Wilkens)

Introduction

Emily Wilkens was an American designer who came to prominence during the 1940s. What Emily designed at that time was considered new, innovative and an important development in the fashion industry. Until the late 1930s-early 1940s, clothing for pre-teens mirrored the clothing for little girls. Teenage girls between the ages of 13-19 had choices, although not attractive ones for their developing figures and personalities. Some designers created clothing sized for the teenage body but that looked very much like that of a little girl’s outfit. Other designers worked with inspiration from the clothing for mature women and sized them for teenage girls. The result was that there was little that was fresh and new until Emily Wilkens set her focus on the developing teenage market.

Emily Wilkins’ Contributions to Fashion

Original sketch and dress with smocking for teenage girls, designed by Emily Wilkens.

“Young Originals” is as much the story of Emily Wilkens as a designer as it is about the birth of her design label Young Originals.

Researcher and writer Rebecca Jumper Matheson has created a book that is informative and exciting to read. She presents an excellent view of the market forces that brought the teenage girl into focus and made her the center of Emily’s design vision. Teenagers were coming into their own by the 1940s and were emerging as a separate market with unique needs and desires. Emily was part of this trend that marked a definite break with the past.

Tee Matheson was one of Emily’s favorite teenage models during the 1940s.

Emily’s ideal model was healthy and radiated a confident beauty. She did not need much make-up, jewelry or fancy hairstyling. Well fitting clothing, tasteful accessories and attention to healthy hair, skin and body were what mattered. Emily sought to free the teenage girl and young woman from the artifice put before the public as a standard of beauty. The famous actress of Hollywood was not an image for Emily. Instead she wanted teenage girls to look at themselves in the mirror and work with what would be most flattering to them.

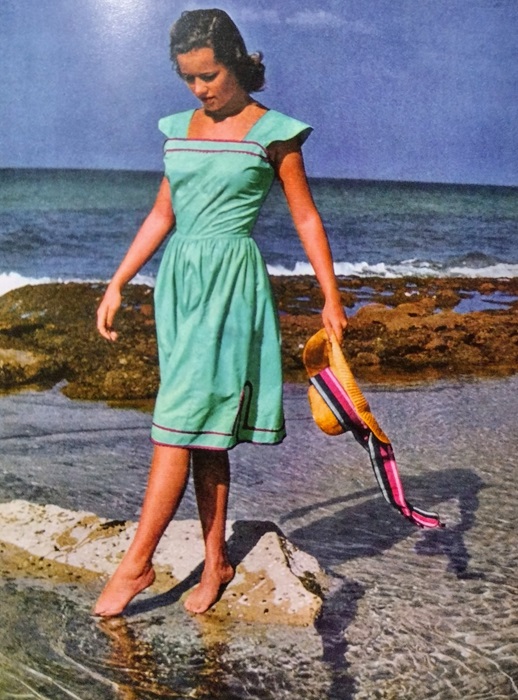
Evening gown for a teenage girl or young woman, by Emily Wilkens.

Although she set a new trend, Emily’s fashions were very modest when we look at them today. In fact from our vantage in time they do not seem as they did when they made their debut. If anything some of Emily’s dresses look a bit too little girl and not enough for the young woman developing during the teen years. Still there is a fresh, easy going quality to her designs that can be adapted to the styles of the past that inspire modern sewistas, patternmakers and hobbyists.

Sketch of one of Emily’s designs.

The book contains many technical sketches of Emily’s designs, as well as photos from private collections. From a photo of an Emily Wilkens label in this book, I got an idea of how I wanted the labels made for my own dressmaking creations. I also like the details on some of her dresses like the bows and appliques. Her use of gloves and handbags also inspires me when I need to draw on how accessories made her total look for teenage girls unique.

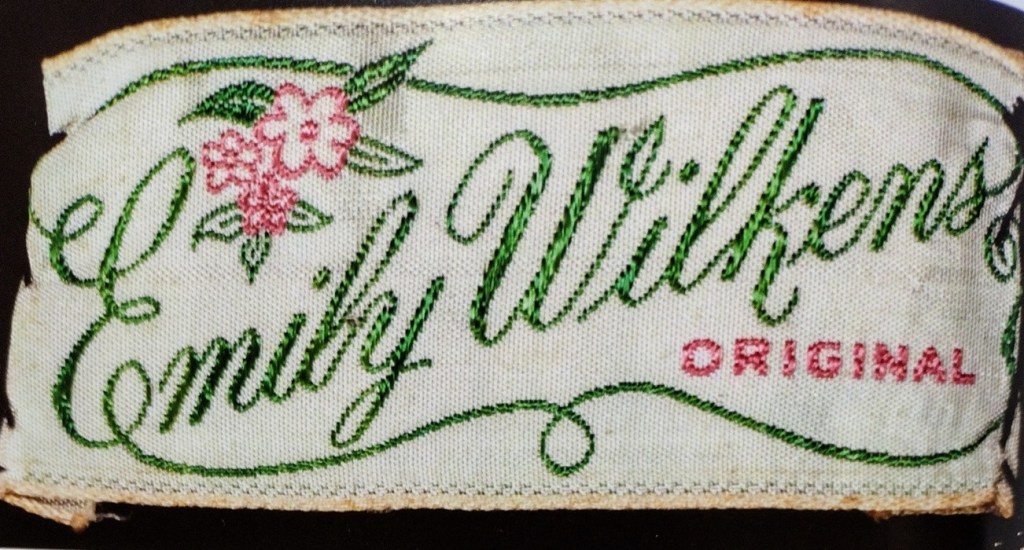
Label used for Emily Wilken’s designs.

I recommend this book to dressmakers and hobbyists with an interest in fashion history. You will learn how the market for teenage clothing for girls and young women started. This knowledge will enrich your understanding of how fashions for this market segment continued rapid growth during the 1950s, 60s and beyond.

Researching and preparing a 1930s inspired pattern sloper

Introduction

I am preparing two slopers this summer. I already created one that I use for 1940s to early 1950s inspired styles. I used that for the Alice Elizabeth dress and the Linda skirt and blouse. I am now in the progress of creating a more structured sloper that I think will work well with the more detailed and fitted styles of the mid-1950s. As a challenge and contrast, I am also researching slopers from the 1930s. The look of the 1930s was very flowing and not fitted the way 1950s clothing was.

My 1940s sloper is available for copying and sizing here. It is a standard Misses 8. The sloper for the 1950s structured fashions is also in a size 8. However, I think the 1930s look is very flattering to smaller sizes so that sloper will be in a standard Misses 4. I do not intend to use drafting systems from the 1930s. Instead, I will drape a basic unfitted bodice and skirt that approximate the look of a set of pattern blocks I located in a small paperback book called Dress Cutting by Margaret C. Ralston. I will draft a fitted sleeve with vertical dart to complete the sloper.

Here are the screen shots showing the basic block Margaret created from her drafting system. I find it a bit confusing to follow. I am also not sure the fit will be comfortable for the modern women. The sleeve looks very fitted and the sleeve seam is 3/4″ to the front of the bodice side seam. While I love vintage styles I do not think it is essential to go so far to recreate or be inspired by the look. The key for me is inspired interpretation.

Pattern Block from Dress Cutting by Margaret Ralston

The bodice front and back appear to be completely unfitted. In some directions for pattern transformations one dart above the bodice is shown. It might also be a tuck. I assume the bodice block had enough width for this dart-tuck to be created.

The skirt is a rectangle equal to half the hip circumference. It is then slashed and overlapped and the top edge so that the waistline measurement results. I plan to drape a basic sheath skirt. Once that fits, I will distribute the dart ease across skirt front and back waistline. Then slightly overlap the sections. That will produce a slightly flared, straight skirt which is the starting point for the skirt styles in this book. For the bodice I will drape an unfitted bodice. It will go straight to the hip and have the waistline marked off as well. There will be one vertical dart above the bust in front and a neckline dart or two in the back. I’m basing the dart positions on the fitting dress or toile shown in the previous posting.

I think developing different bodice and skirt slopers gives one a more extensive collection of shapes to work from. As I research the 1930s, I’m understanding that for the 1960s an unfitted dress sloper works well. So would an A-Line skirt sloper. Those are the two key shapes for dresses and skirts of the 1960s.

Here are the snap shots of the pattern blocks from Dress Cutting. The last snap shot is a dress that can be made using he pattern blocks and transformation instructions in the book.

Cover of Dress Cutting by Margaret Ralston.

Bodice front and back.

Basic skirt front and back.

Basic sleeve.

Fitted sleeves.

One of the styles that can be created using the block and instructions in Dress Cutting by Margaret Ralston.

Dressmaker’s Library:  Drawing the Fashion Figure for Body Positivity

Introduction

The standard croquis favored in fashion illustration is an elongated, slender figure that can be 8, 10 or 12 heads high.  However, this style of croquis is not a modern model of beauty.  It has come and gone with variations throughout the 20th century and into the current time.

Fashion designer Erte favored an elongated figure upon which to draw his extravagant designs worn by high society women and actresses on stage during the late 1910s.  The boyish, angular fashion figure of the 1920s gave way to the willowy, softly curving fashion croquis of the 1930s.  Come the 1940s and 1950s the feminine form filled out and there were some artists writing and illustrating their own books showing students, aspiring illustrators and hobbyists how to draw male and female figures more reflective of the everyday body shapes .

In this posting I share screen shots of three fashion illustration books that I hope put the subject of body positivity and fashion illustration into a historical perspective.

My purpose is to set forth a balanced perspective not only in books that provide croquis to trace over.  I also want to make more widely known books that show you how to draw a body positive croquis in a step-by-step approach.  All croquis are based upon preliminary drawings consisting of ovals, rectangles, cylinders, circles and wedge shapes.  With practice you can gain even a rudimentary ability and in time you will be able to do quick sketches.  The key is to practice and let your hand movements flow without fear or worry. Enjoy the process and discover what is waiting to be expressed.

It is good to know how to draw croquis of different sizes and styles.  This diversifies your skillset and helps connect you as a dressmaker to a broader sense of proportion based on different sizes.

The style of croquis you use should be the one that pleases you and best expresses the idea you are working on.

Fashion Illustration 1920-1950
Techniques and Examples
by Walter T. Foster

Foster’s book offers detailed diagrams for figures and clothing of the period from 1920s to 1950s.  This is one of my favorite books for fashion illustration because the figure changes with each decade.  Male and female figures are given and detailed.

Drawing the Head and Figure
by Jack Hamm

This book was published in 1963.  The croquis and technique used will help you draw figures in tune with the current call to create more realistic renderings of female body shapes.  The technique used in the book will provide looks that work well with retro styles of the 1940s and 1950s.  Examples are also give for drawing the male figure.

Gertie’s New Fashion Sketchbook
by Gretchen Hirsch

The premise of Gertie’s book is a good one.  Gertie’s body positive croquis are intended to represent the a more realistic body upon which clothes can be sketched. The croquis are smaller than most standard sized croquis.  The upper and lower torsos are each two heads high with the length of each head being about 3/8 to 1/2 inch high. Each page has two to three croquis in different poses (front, back and side views).

The drawback is how faint the croquis are on each page. This is not a book of figures to trace over. Rather these are figures to draw on.  Each page is perforated and meant to be torn out and drawn over.  Because the figures are so very lightly printed I’d recommend using the pages over a light box.  Otherwise a very bright desk lamp is needed to ensure you draw the lines as best as possible.

Gertie’s croquis remind me of the ones Jack Hamm drew, only his are bolder and easier to render if photocopies are made and then traced over.