Introduction

I use the modern draping system created by Hilda Jaffe and Nurie Relis in their book “Draping for Fashion Design”. It is one of the better books on the subject for me. I am always satisfied with the fit that results from their technique. I also add in some vintage fitting and sewing techniques to my design and sewing repetoire when they enhance efficiency. Pin fitting is one of these techniques.
Pin fitting is not presented in the modern sewing and design books in my Dressmaker’s Library. It is, however, commonly featured in the vintage sewing and pattern drafting books that are also in my library at home.
While it is not a substitute for sewing and fitting a completed muslin toile, it is a quick and efficient way to test the accuracy of darts, seam placements and other pattern details. I find the pin fitting process a great way to spot check the development of a completed drape and subsequent transfer to a first paper pattern.
The Initial Drape
The photos used in this section are those of the basic fitting toile after the dots and Xs of each draped piece have been connected using pencils and rulers.
Update 10-4-20: Please see my posting Draping: Placement and Length of Darts concerning corrections made to the darts shown in the photos of the first toile you see here.

A half toile of the basic muslin fitting toile is draped on the dress form. Markings are made lightly in pencil. Once all pieces have been pinned and marked the drape is removed and pressed. Draping is not always precise in the way flat patternmaking is. Th vertical dart on the front bodice needed straightening and redrawing.

The dots and X’s used to mark the drape are then connected using French Curve, L-Square and straight rulers. An Armhole/Hip Curve ruler is also used. Pattern pieces are measured to ensure back and front side seams are the same length. Armhole curves and hip curves are also checked for a smooth flowing line in each piece.

Each piece of the muslin drape is now pinned to the pattern paper. A special tracing wheel is used to transfer the markings to pattern paper. The tracing wheel is very sharp and leaves a discernible outline after the muslin is removed. Rulers and pencils are used again to connect and make the markings more easy to see.
Pin Fitting the First Pattern
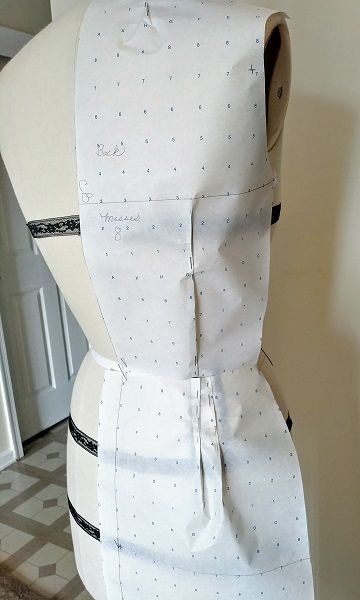
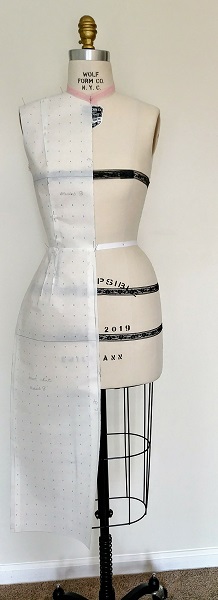
The photos used here are those of the paper pattern created by transferring the muslin pattern to pattern paper.

This is the point where I use pin fitting to do a quick spot check for darts and side seams. Each pattern piece is pinned along the darts and then pinned to the form. I check to make sure the darts line up and end where they are supposed to.
Sometimes even a quick check through pin fitting will show that there is a need to add a fraction of an inch (or slightly more) to side seams. At other times, an adjustment to the dart apex line might be needed. This happens because sometimes during draping the muslin may have been pinned a little too tightly. At other times it may have had too much ease added. In which case the paper pattern may go beyond the side seam or place it is supposed to be.
I make the needed adjustments to the first paper pattern. Then each piece is measured again at side seams, bust dart, back darts and other check points.
The pin fitting of the paper pattern at this stage has saved me the time that would have been spent making corrections to the first muslin had the needed minor adjustments been overlooked.
The pattern is now ready to be cut as a full muslin and tested for fitting on the form.

One thought on “Draping: Pin fitting the First Pattern”
Comments are closed.