Introduction

The neckline and armholes of the 1950s styled Dirndl Dress were finished with an all-in-one facing. The instructions I followed are from Reader’s Digest Complete Guide to Sewing, seventh printing, July 1980.
Preparation

I cut the interfacing for the neckline and the armholes separately. The interfacing can be cut on the bias to give the armholes and neckline a little more flexibility when the facing is turned to the inside. If you do this be sure to stay stitch the armholes and neckline of the dress after basting the interfacing to the wrong side of the bodice.
Pin and baste interfacing by hand to the bodice pieces. Do not sew the side seams of the bodice yet.
Sewing the all-in-one facing
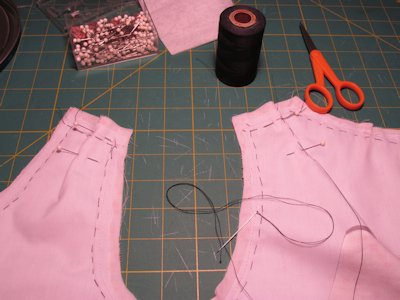
1. Pin and hand baste side seams of bodice front and back pieces. Machine stitch. Remove the basting threads. Steam press side seams open.
2. Pin into place small tucks at the mid-point on the shoulder lines of front and back bodice. Hand baste into place.

3. Pin, baste and stitch side seams of facing. Remove basting threads. Steam press side seams of facing open.
Finish lower edge. I used a straight stitch to sew flexilace into place at the top edge. Then I used a zig-zag stitch to sew the edges together.

4. With right sides together, pin the facing to the bodice. Shoulder lines are not stiched yet. The bodice remains flat. Baste by hand up to the intersection of armhole and shoulderline and intersection of neckline with shoulderline. The stitching stops slightly before the seamline of the shoulder. Machine stitch.
Remove basting threads.
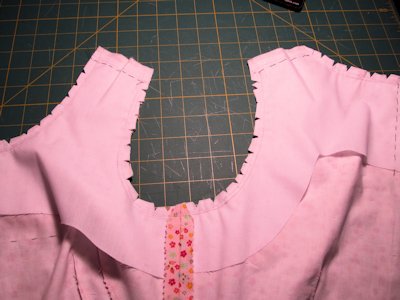
5. Clip and notch armholes and neckline.
Finger press seams open.
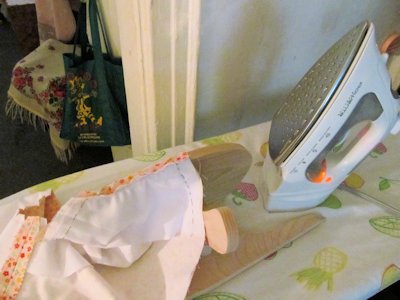
6. Use a Tailor’s Curve to steam press seams of armholes and necklines open.
Turn facing to inside of garment.
7. It is time to understitch the facings so they do not roll and become exposed on the outside. Make sure the seam is turned towards the facing before stitching.
Instead of machine stitching the facing along the armhole and neckline on the facing, I hand sewed it into place using a prick stitch.
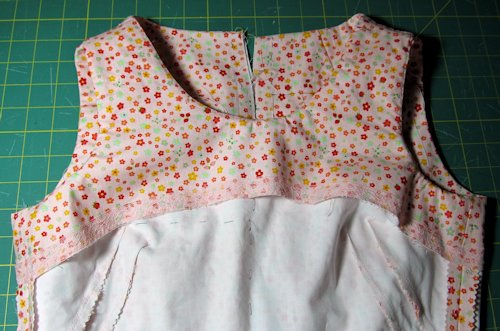
8. The facing is almost complete! Make sure it lies flat. Keep the tucks at the shoulder in place.

9. Turn back facing at shoulder lines. Release the tucks and work the ease into each shoulder line. Pin front and back shoulder lines together. Hand baste into place. Stitch.
Remove basting stitches. Steam press shoulder seams flat. Then press them through the opening. Baste the facing over then slip stitch together.
10. Tack the facing in place at the side seams.
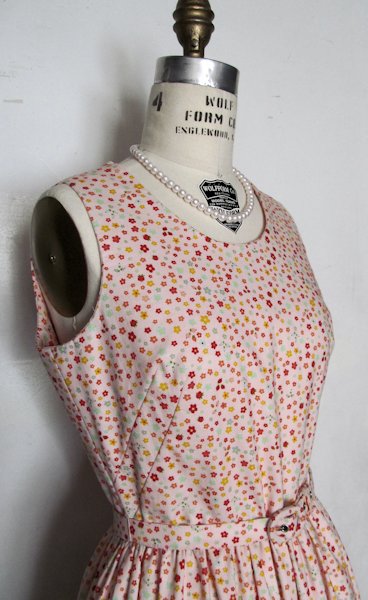
Place the completed bodice onto a dress form to evaluate the results. The facing should rest secure on the bodice and not show on the outside.

You must be logged in to post a comment.