Introduction

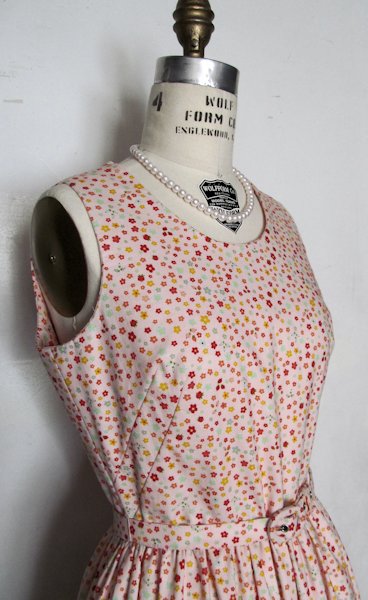
I purchased this dress during the Covid-19 Lockdown of Spring 2020. At the time I was teaching myself Precision Draping, a vintage draping technique created by Nellie Weymouth Link. Through that self-learning I was becoming very aware of the effects dart manipulation had on creating vintage looks. I bought this dress as a study piece.
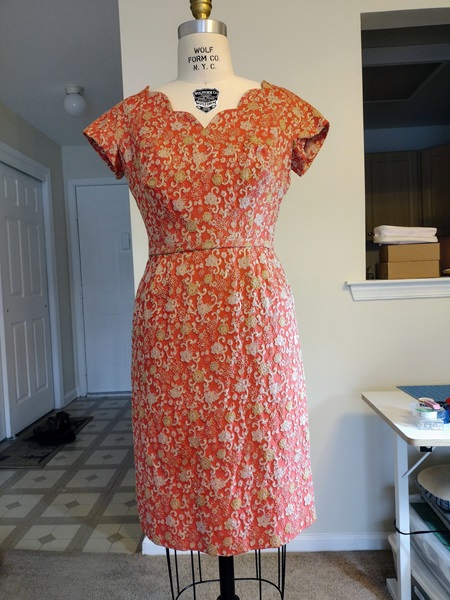
No specific decade was assigned to the dress. After studying the construction I estimate it was made late 1950s-early 1960s. I say that because of the lapped zipper application at center back. Many of the early 1950s dresses I have as study pieces, have lapped zippers in the side seam. Another indicator of time period is the skirt length. At the height of the 1950s skirt lengths were to mid-calf. As the 1960s began hemlines rose to an inch or a few inches right below the knee. This skirt comes to about 1 1/2″ below the knee when I am wearing it. I am 5′ 5″ tall.
The dress is shown here on my 2019 Wolf Misses Size 8 dress form. This dress may have been custom made. The waist is situated an inch above the dress form waistline. The bust apex is also slightly higher than the apex on the form.
I want to share the inside details with you because they offer a wealth of information about how dressmakers and home sewistas constructed their clothing during the late 1950s-early 1960s.
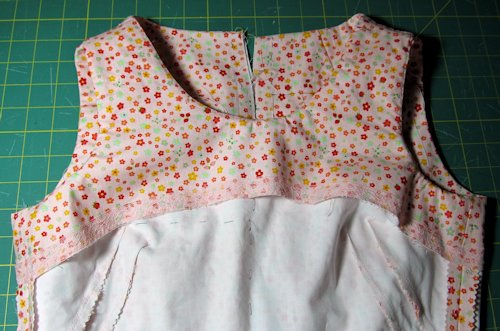
Bodice Front: Bustline Darts and Apex Point
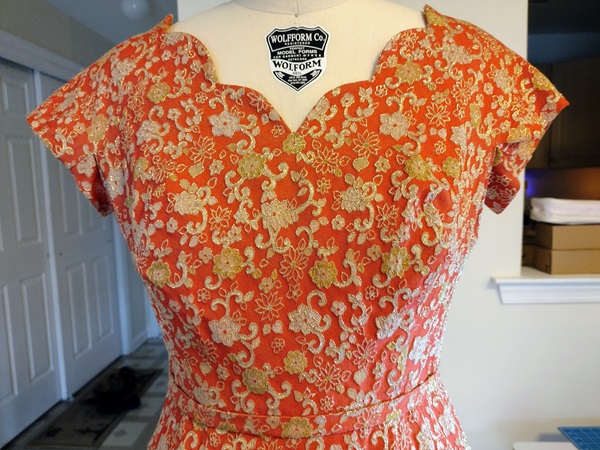
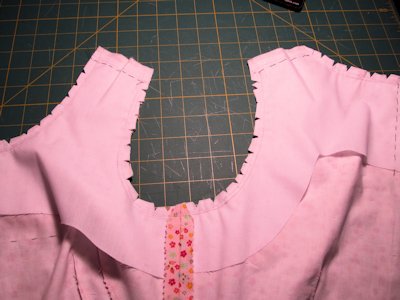
There are 2 darts shaping the bodice front. The darts meet very closely at an apex point slightly above where the apex point is on the dress form. On the form the length from neck to apex point is 10 inches. On the dress the apex is about 1/2-5/8 inch above that. I can only think that the dress was designed based on the bullet bras or balconette bras of the time period. These were highly boned and made to uplift the bust very high, so that it would be visible against a low cut neckline. The neckline on this dress is not so low, so I think the point created by the two darts is intended to draw the eye further upward. It creates interest at the bust and lessens the ability of the eye to see that the wearer is short waisted.

As you can see in this closeup, the two darts converge at the apex point of the bust. There is a horizontal dart beginning at the front side seam. The vertical dart originates at the waistline, and goes up to the apex. From the apex it angles upwards. I think this bodice might have been adjusted for a customized fit. The angled portion above the apex could have been created during a fitting. The only other explanation I have for this unusual vertical dart is that another dart may have existed at the neckline. It was closed and transferred to the vertical dart. The neckline might have required contouring so that it fit better. Both on the dress form and myself the effect of the vertical, angled dart does not look flattering up close. Not even my underwire push-up bra makes the bodice look good! That is how high up the apex is!
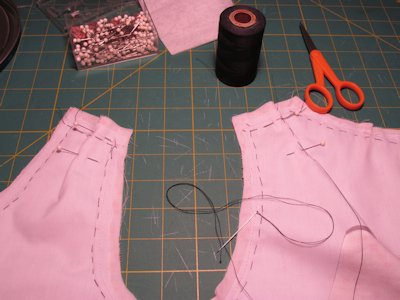
Sleeve: Short Mounted Sleeve with Gusset

Short mounted sleeves with a gusset were used for the dress. The point of the gusset begins a little above the waistline. The point and corners of the gusset are very neatly sewn. You can get a better idea of how neat the sewing is by looking at the lining.
This type of sleeve gives a very close fit under the arm. It may have been chosen because the upper part of the sleeve is cut in one with the bodice at front and back. In wearing this dress, I loved the look but not the restriction on my movement. If I raised my arms very high or very often, the entire dress moved up with them. There is not enough room to move very freely or with a great scope of movement.
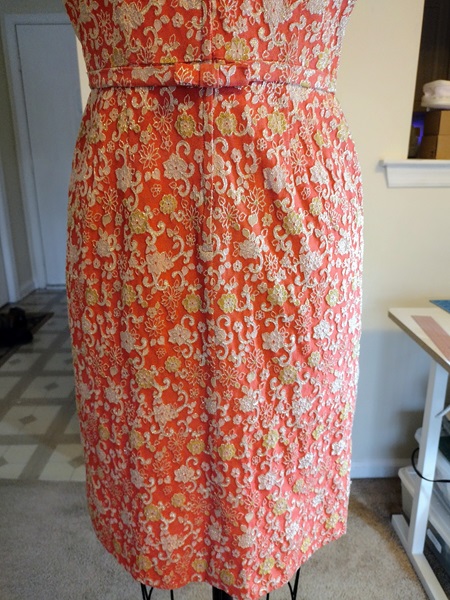

The darts of front and back skirt are not as long as darts on modern skirts. They are also positioned more to the side seams than close or on the princess lines. The front darts are about 2 1/2″ each, the back darts 4 1/2″ each. The effect is very rounded. Again, this indicates to me that the dress was custom fitted.
For flat patternmaking I use the French Fashion Academy Method by John Klamar. In that system the dart placement for the first dart is center of each skirt panel. This means half distance from Center Back and half distance from Center Front.skirt. The second dart is 1 1/2″ from the center of the first dart. Dart lengths are longer, too. The entire effect is more elongated and, I think, more flattering when the basic skirt is made up.
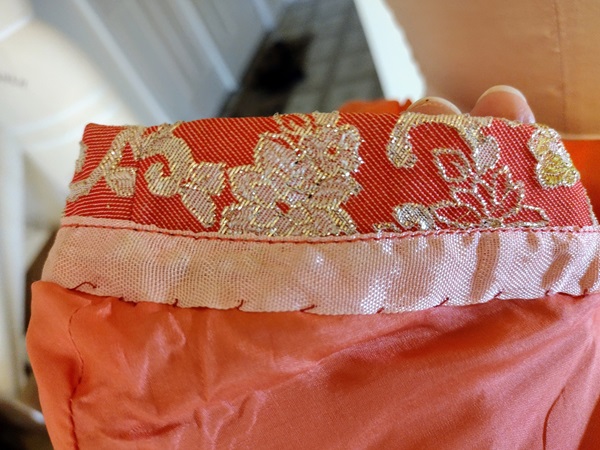
Closure: Center Back Lapped Zipper

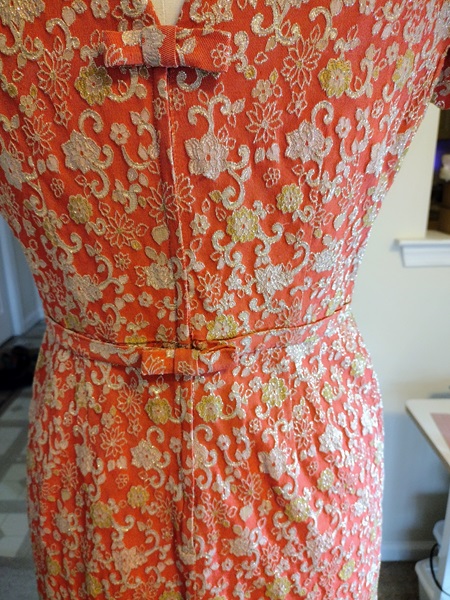

The zipper closure at center back is beautifully finished. The addition of two bows at the waistline and top of the zipper adds yet another unique touch to this dress. The folded band over the waisline is hand sewn into place. It creates the look of a belt. The zipper even has a fabric loop and hook at top.
Finishings: Seam finishes, hems, bra strap holders
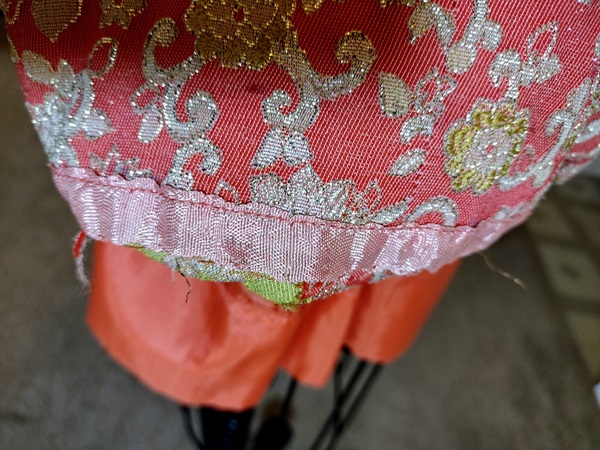

The dress is completely lined. The skirt lining hangs freely away from the bodice and is machine hemmed. The rest of the dress was hemmed by hand at skirt hem, sleeves and where the lining is attached to the neckline facing. Seams were pinked. The bra strap holder was made with the lining fabric.
What is the story with the darts?
I wondered why so many darts were used at the bustline, and why the darts at the hipline created a more rounded effect than I am used to seeing, even in vintage clothing.
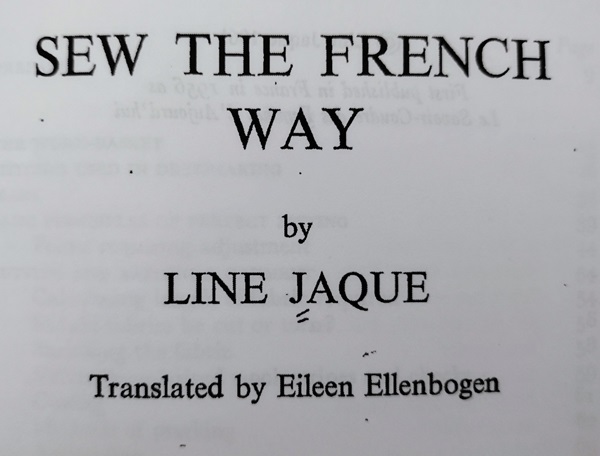

I recently bought a reprint of a late 1950s sewing book entitled Sew The French Way by Line Jaque. I do not have any information about the author except that the book was originally written in French. In this book Line Jaque provides fitting instructions that are outside the norms of commercial patterns. The emphasis is on using as many darts as needed to achieve a good fit.
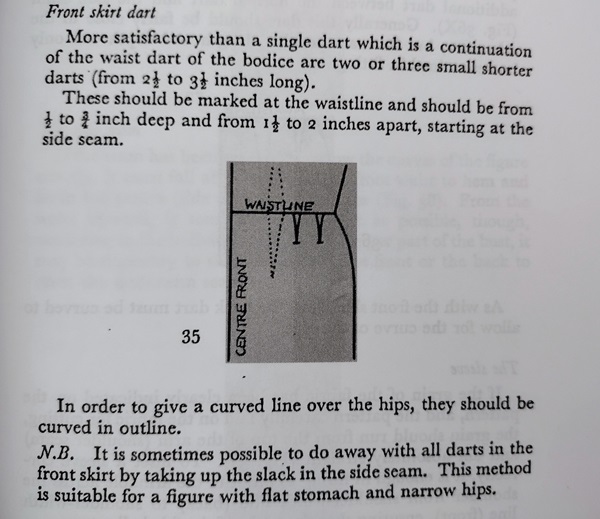
There are illustrations showing the kinds of dart placement found on the skirt of my cocktail dress. The lengths recommended in the book are the same as the dart lenghts for the skirt of my dress. I found this very interesting, too, because Line Jaque states it’s not necessary to have skirt darts align with bodice darts. Everything must be placed for the best fit possible.
Here is another illustration from the book showing the bodice of a dress with long mounted sleeves that have a gusset. Note the skirt darts. I hope this analysis has helped further your understanding of vintage garment sewing construction and design details.


You must be logged in to post a comment.