Hand worked buttonholes are an acquired talent. They take more practice to become good at. There is a benefit to using them. First it is the mark of a custom made garment. It sets the garment apart from mass produced clothing. There is also more control in the stitching and less risk of stretching or fraying the fashion fabric.
Here is how I make my handmade buttonholes.
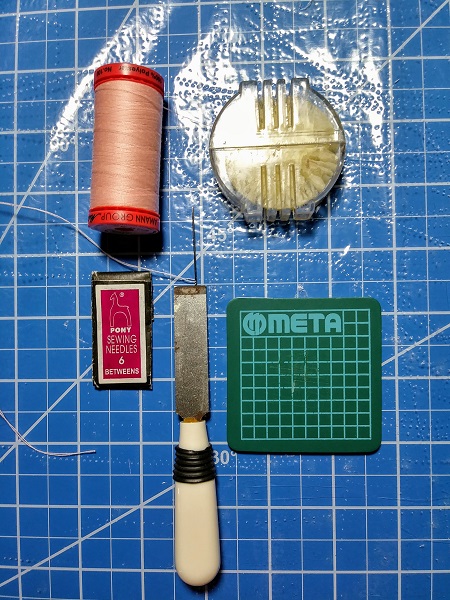
Step 1: Assemble your tools. I use a double strand of poly cotton thread. To prevent tangling, the thread is coated with beeswax. A short sewing needle works best. Experiment to find the size best for you. I use #6 Betweens. To cut the buttonhole cutter set (little mat, blade shown. keyhole punch not shown).
Step 2: Practice first! Use however many layers of fabric as will be in the finished garment. For this practice piece I have two layers of fashion fabric (garment and facing) and interfacing (not shown).
I pressed a line to positioning the cutting line for the button hole. On the finished garment I marked the line using white erasable chalk on the inside of the garment. Then I machine stitched a long line of basting stitches.
The beginning and end of the buttonholes are marked in pencil on the practice piece. On the finished garment they are measured and marked with pins along the line with basting stitches (button and buttonhole placement line). Basting thread is used to mark these points and the pins are removed.
To calculate the length of the finished buttonhole. Measure the width of the button and add it to the height. To this result add 1/8″ for the bar tack at each end. A test buttonhole is the best way to make sure the measurement is correct.
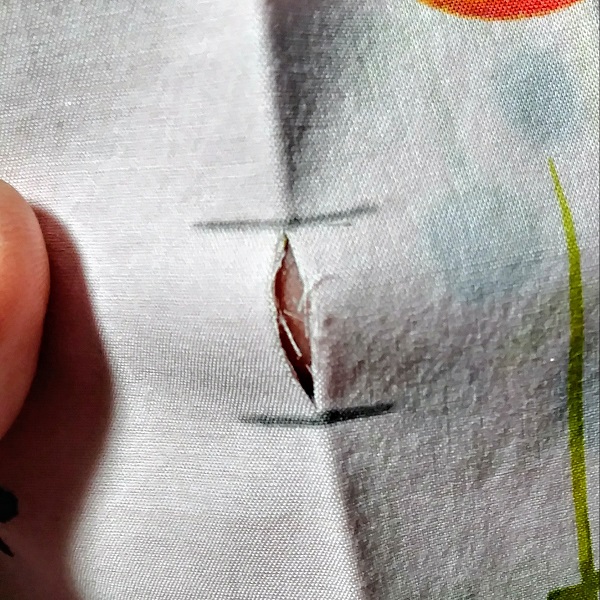
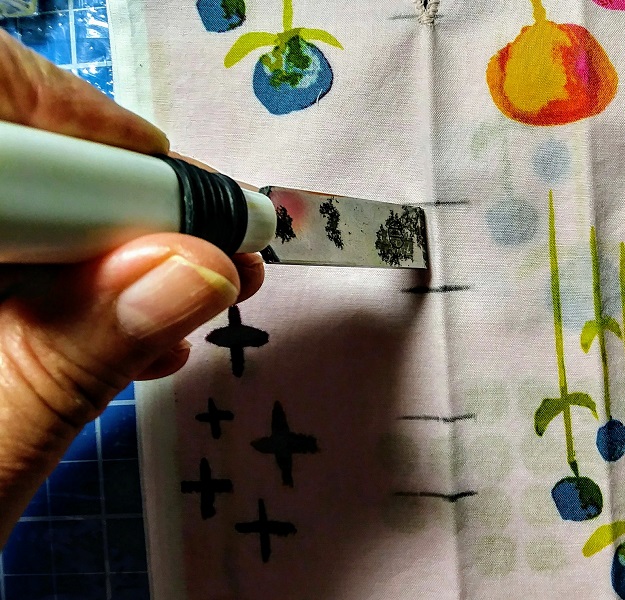
Step 3: The little mat is placed beneath the garment where the buttonhole will be. The garment is placed on top. The blade is positioned along the pressed line (or basting stitched line) and pressed firmly down. A neat opening results. If needed use a small scissor to open the buttonhole a little more.
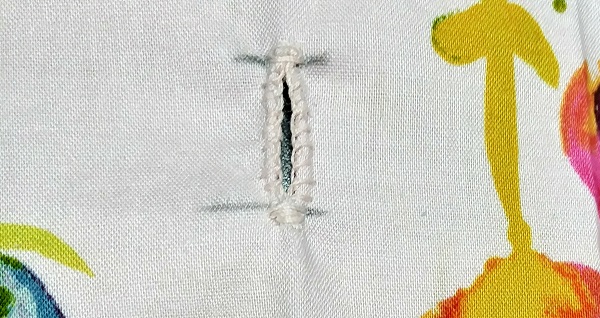
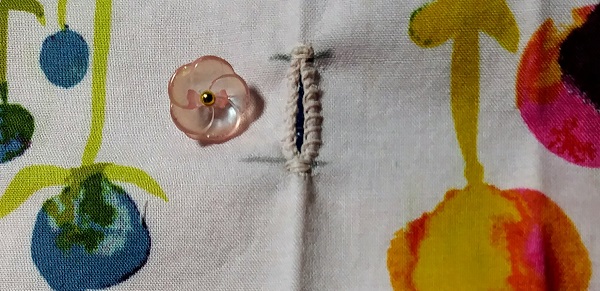
Steps 4 and 5: Using a waxed double strand of thread, first overcast the slit all around. Knot and cut from the wrong side. Wax another double strand of thread. Use a buttonhole stitch to work around the buttonhole. When you come to each end, make the bar tack.
Step 6: Test your buttonhole for length.

Step 7: Test the workability of your buttonhole. It should go through the buttonhole easily. Sew a button to another piece of fabric and they pass through the buttonhole again. Move the fabric around. The button should stay securely closed. It should not pop out of the buttonhole.
Some people like to steam press the thread after waxing it and before hand stitching their buttonholes. I have had mixed results with this technique. Sometimes the thread is too brittle and breaks. It will all depend on what kind of fashion fabric you use and how thick the layers are.

You must be logged in to post a comment.